How to build a van conversion 101

Building a van conversion typically involves several stages, each of which is important for the overall process. Here are the common stages involved in building a van conversion:

  1. Planning and Design.
  2. Define your goals and requirements for the van conversion.
  3. Determine the type of van that best suits your needs (e.g., cargo van, camper van, passenger van).
  4. Create a layout and floor plan for the interior, considering essential features like bed, kitchen, bathroom, storage, and seating areas.
  5. Plan the electrical and plumbing systems, as well as any other specific requirements you may have.

Striping and cleaning:

The original van before stripping it all back

Stripping a van is an important step in preparing it for a van conversion. Here’s a step-by-step guide on how to strip a van:

  1. Empty the Van:
  • Remove all personal belongings, seats, carpets, and any other loose items from the van.
  • Dispose of or store items that you won’t be using in the conversion.
  • Remove Interior Panels:
The van stripped back to its bare metal without any panals or floor.
  • Begin by removing any interior panels, such as side panels, ceiling panels, and floor coverings.
  • Carefully pry off panels using a panel removal tool or a flathead screwdriver. Be cautious not to damage the panels or the van’s structure.

Remove the Headliner:

  • If your van has a headliner, carefully remove it. It is usually held in place with clips, screws, or adhesive.
  • Use a trim removal tool or a flathead screwdriver to gently detach the headliner from its fasteners.

Take Off Floor Coverings:

  • Remove any existing floor coverings, such as carpets or rubber mats.
  • Depending on the van, you may need to remove screws or adhesive to lift the floor covering.

Disconnect Electrical Components:

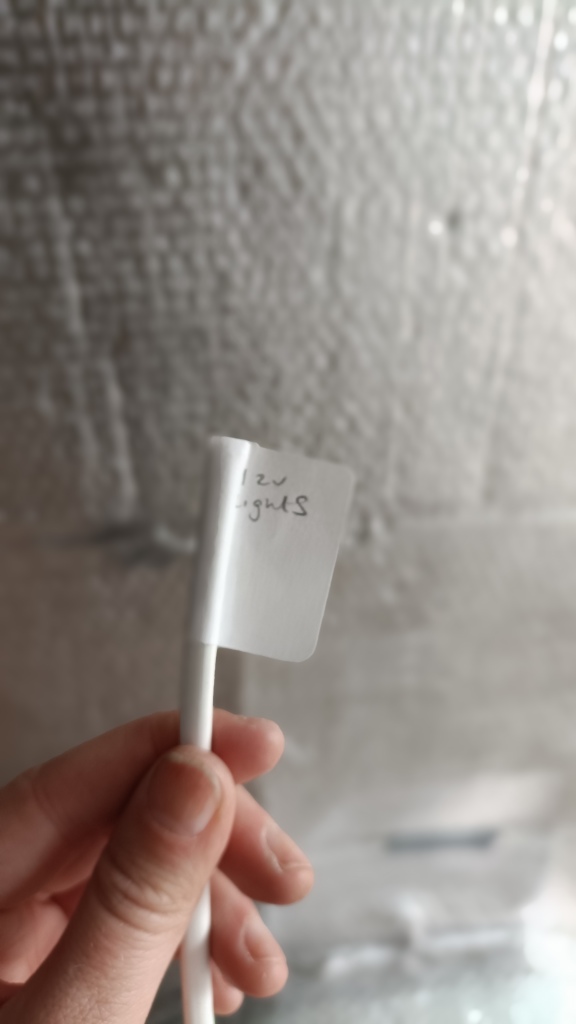
  • Identify and disconnect any electrical components, such as lights, speakers, or auxiliary power outlets.
  • Label wires or take pictures for reference if you plan to reuse or reroute any electrical connections.

Remove Excess Wiring and Accessories:

  • Inspect the interior for any unnecessary wiring, brackets, or accessories that won’t be used in the conversion.
  • Safely disconnect and remove these items to create a clean slate for your conversion.

Inspect and Clean:

  • Inspect the van’s interior for any signs of rust, leaks, or damage. Address any issues before proceeding with the conversion.If you come across rust, treat it by using a wire brush to scrub the rust away and treat the spot with red oxiode then repaint.
  • Clean the interior thoroughly, removing any dust, debris, or residue left from the stripping process.
Equipment for treating rust

Remember to work methodically and be cautious when removing components to avoid damage to the van or personal injury. It’s a good idea to document the removal process with photos or notes to assist you during the conversion phase.

Windows and Skylights

Time to make some holes in your lovely new van! is there anything more nerve wracking?! I cut into my sliding door to make a side window using privacy glass brought from from vanpimps.

Cutting a window into your van is a significant modification during a van conversion. Here are the general steps to help you cut a window:

Planning:

  • Determine the desired location for the window in your van. Consider factors such as visibility, structural integrity, and the overall layout of your conversion.
  • Measure and mark the exact dimensions of the window on the van’s exterior. Use a measuring tape, level, and a marker to ensure accuracy.

Safety Precautions:

  • Before cutting, ensure you have the necessary safety equipment, including safety glasses, gloves, and a dust mask.
  • Take into account any electrical wiring or plumbing that may be present near the window location. Turn off the power supply and disconnect any relevant components before starting.

Gathering Tools and Materials:

  • Obtain the appropriate tools and materials for the job. You may need a jigsaw or reciprocating saw, drill, metal cutting blades, masking tape, and a pry bar.
  • Consider using a window installation kit, which typically includes a window frame, gasket, and screws. I brought my kit from Vanpimps as a window fitting kit. This came with trim, adhesive and rust treatment.

Start by marking the Cut:

  • Tape off the area around the marked window outline on both the interior and exterior of the van. This will help prevent paint chipping and provide a guide for cutting.
  • Double-check your measurements and alignment to ensure accuracy.

Cutting the Opening:

  • Begin cutting along the marked outline from the exterior side of the van. Use a jigsaw or reciprocating saw with a metal cutting blade.
  • Take your time and follow the line carefully, ensuring smooth and precise cuts. Keep the saw at a slight angle to create a flared edge on the exterior side, allowing the window to sit flush with the van’s exterior.

Removing the Cutout:

  • Once the initial cut is complete, go inside the van and remove any interior paneling or insulation that may obstruct the cutout.
  • From the interior, carefully cut along the same marked outline to complete the opening.
  • Use a pry bar or similar tool to gently remove the cutout section from the van.

Finishing:

  • Smooth any rough edges or burrs around the cutout using a file or sandpaper.
  • Clean the area to remove any debris or metal shavings.

Installing the Window:

  • Follow the instructions provided with the window installation kit to prepare the window frame and gasket.
  • Apply an appropriate sealant or adhesive around the window opening, following the manufacturer’s recommendations.
  • Insert the window into the opening, aligning it properly with the van’s exterior.
  • Secure the window frame to the van using the provided screws or bolts, following the manufacturer’s guidelines.

Remember, cutting a window into your van requires precision and caution. If you’re unsure about performing the task yourself, it’s advisable to consult a professional or an experienced individual to ensure the job is done correctly and safely.

Insulation and Soundproofing:

The van with the Do Do soundproof matting

Install insulation to regulate temperature and minimize condensation. Common insulation materials include foam board, spray foam, or mineral wool.

Apply sound deadening materials to reduce noise and vibrations inside the van. This step is particularly important if you plan to use the van for traveling or living purposes.

To keep warm and cool it is important to apply insulation and ventilation to the van. I personally used a MaxxAirFan to the ceiling and an air vent in the toilet to allow for ventilation. For my insulation I used dodo matting for soundproofing, Celotex board for the insulation for the large side and wall panels and rock wool (Sheeps wool is better) for the smaller cavities. I used Therowrap to create a vapour barrier, and then I created a 2x 2 treated timber frame with noggins for support and applied 8mm ply boarding to the walls and 5mm to the roof.
To prevent damp I have also purchased dehumidifying crystal boxes, which can be stored in the shelves and under the bed. They work by trapping the natural moisture in the air from breathing and living in the van.

Electrical InstaLLation

Alongside soundproofing a good idea would be to now start laying cables for the placement of you sockets, switch and appliances. It may seem a long way off as a process, but by having the correct placement of your wires it saves having to mount your wires externally to the walls after you have finished them with carpet or cladding etc.

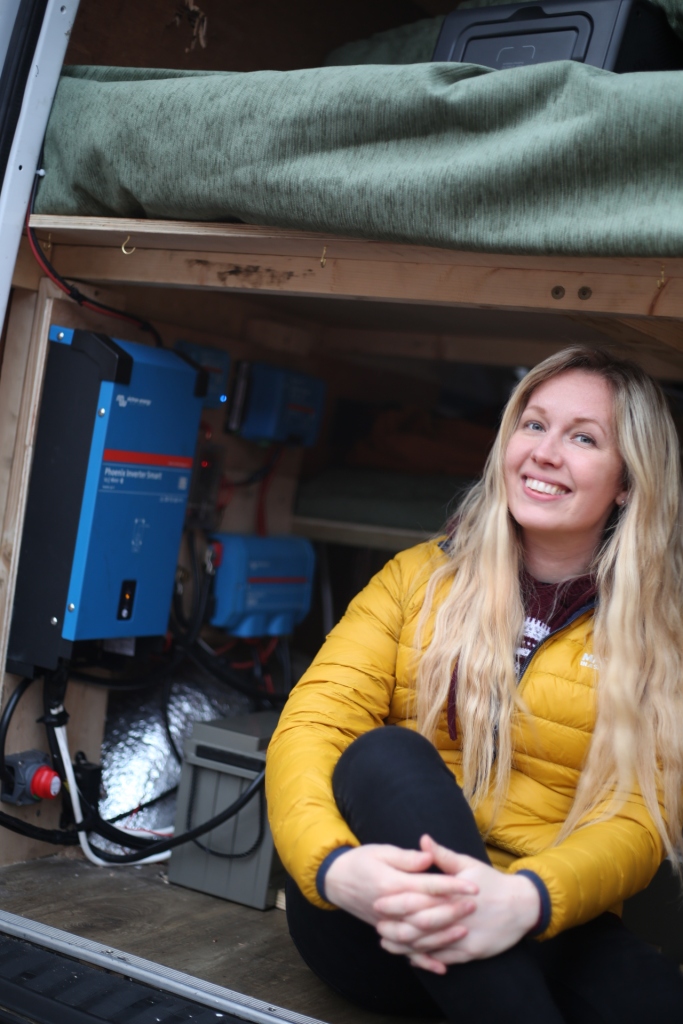
  • Design the electrical system, including wiring, outlets, switches, and a distribution panel. I used a piece of ply to mount all of my main devices such as my invertor etc, as you can see the picture above. This is to help me keep the wires neat and tidy, and get to follow the connections if needed at any point and I won’t need to start ripping apart the carpet or panels to access them.
  • Measure how much power you will need in the van by recording your hours of consumption and voltage of your devices and then calculate how much power you will need. Estimate your electronic usage and then you should be able to figure out if for example: If you would be better of with one or two leisure batteries along a split charge system where the van battery recharges your leisure batteries would be best.
  • Research leisure batteries that will be suitable for your needs and budget. Lead lined batteries are cheaper and last a few years depending on their usage. However lithium batteries are lighter in weight and last longer, the catch is there are double to triple the price. When thinking about where to house them in your van make sure they are accessible and in a warm place as they don’t like to lye dormant or in the cold. I have used ply to create a framework to house my batteries so they don’t slide or move around and a ply breathable box to keep them ventilated and warm.
  • Installing an electric solar power leisure battery system in a campervan can provide you with a renewable and independent source of electricity. Here’s a general guide on how to install such a system.
  • Install lights, fans, appliances, and any other electrical components you plan.
  • Gather Materials and Tools: I would recommend, crimpers, cutters, wire strippers, a multi boxes of lugs electrical tape, cable connectors of different sizes if you are using both 12v (2 core cables) or 240 ( 3 core cables) to save you money and time during the build ordering tool as you go and waiting to complete jobs when they arrive!
  • Solar panels: Choose panels with the appropriate wattage to generate enough power for your needs. Monocrystalline or polycrystalline panels are commonly used. The bigger roof the more roof for power you can have.
  • Charge controller: Select a controller that matches the voltage and current rating of your solar panels and battery.
  • Inverter (optional): If you need to power AC devices, choose an inverter with the appropriate wattage rating . Fore example most household devices run from 800w to 1800w for things like a kettle or hair dryer.
  • Wiring and connectors: Ensure you have the necessary cables, fuses, connectors, and terminals for your specific setup. I made all my cables from scratch cutting each piece of wire then crimping a lug loop on the end, wiring and testing the connection. This was extremely time consuming but cost effective.
  • Mounting hardware: Depending on your preference, you may need brackets, adhesive, or other materials to mount the solar panels. Amazon was my go to for anything like z shaped mounting brackets.


Plan the System:

  • Determine the optimal location for mounting the solar panels on the roof of your campervan, considering factors such as sun exposure, clearance from obstacles, and aerodynamics.
  • Plan the wiring routes from the solar panels to the charge controller, battery, and other components like a fuse box panel and you need a master off switch by the earthing points. For me I just used the metal of the van chassis and rubbed the paint off as a contact point and attached a bolt to connect it to.
  • I felt really underconfident about how to plan my wiring system and what components I would need. I used TinyBuilds Electrical Company. I had a 1 to 1 consolation with Tom, who created a consultation of my average electrical usage. He then designed a bespoke wiring diagram for me and gave me a list of components that suited my budget. After another consolation in which Tom advised me on how to install the system, he made me feel confident to order all my components which came quickly and by signed delivery quickly. I was then added to a support network of customers who have also installed their own systems and share advice tips as on going support and free consultation network. I would really recommend Tiny Builds as as an expert consultation service and to assist in ordering high quality components from registered companies like Victron as their official UK provider.
  • Install Solar Panels:
  • Clean the mounting area on the roof and ensure it is free from any obstructions or debris.
  • Mount the solar panels using the appropriate hardware, ensuring a secure and waterproof installation.
  • Connect the solar panels in series or parallel, depending on the voltage and current requirements of your system.
  • Install Charge Controller and Battery:
  • Mount the charge controller near the leisure battery, ensuring proper ventilation and access for wiring.
  • Connect the solar panels to the charge controller, following the manufacturer’s instructions.
  • Connect the battery to the charge controller, ensuring correct polarity and using appropriate fuses or breakers for safety.
  • Wiring and Connections:
  • Route the wiring from the solar panels to the charge controller and battery, securing the cables using suitable clips or cable management solutions.
  • Use appropriate wire gauges based on the current and distance of the cable runs to minimize voltage drop.
  • Connect the wires using crimp connectors, soldering, or other reliable methods.
  • Install fuses or circuit breakers in the wiring to protect the system from overcurrent situations.
  • Optional: Install Inverter and AC Power Outlets:
  • If you plan to power AC devices, install the inverter near the leisure battery and connect it to the battery terminals.
  • Run appropriate gauge wiring from the inverter to AC power outlets or devices, ensuring proper grounding and following safety guidelines.
  • Test and Inspect:
  • Test the system by exposing the solar panels to sunlight and monitoring the charge controller’s status and battery voltage.
  • Verify that the battery is charging properly and that the charge controller is regulating the charging process.
  • Check all connections for tightness and ensure there are no loose or exposed wires.
  • Secure and Protect:
  • Secure loose components, ensure proper insulation and protection of the wiring, and make any necessary adjustments or modifications.
  • Consider using cable management solutions and grommets to protect the wiring from chafing and exposure.
  • Always follow safety guidelines, consult manufacturer instructions, and adhere to local regulations when installing an electrical system in your campervan. If you’re unsure about any aspect of the installation, it’s recommended to seek the assistance of a professional electrician or someone experienced in solar power installations.

Plumbing System

Design and install the plumbing system, which may include a water tank, sink, faucet, shower, and toilet (if desired). I have a waste tank mounted to the underneath of my van which has two pipe and trap connections to my sink and shower tray. Collecting all the waste water and catching and storing it in a 30L tank. My fresh water tank comes from a 10L tank, which is removable and lives underneath my sink and is connected by a hose to a self priming pump. This means I do not have an independent priming switch. Instead I have a 12v connection to an isolating switch and another split connection to a high or low pressures switch for the pump. This is because I wanted the option of low pressure for washing dishes and high pressure for having a shower. I installed a domestic extendable tap. This means the hot water valve is currently isolated as I don’t have a hot water tank in the van currently. However, I do have plans to install one at a later date. I found the plumbing system the trickiest part of the installation so if i i was to install it all again this is the process I would take.

  1. Install pipes, fittings, and valves, ensuring proper connections and sealing to prevent leaks. Consider wastewater disposal options, such as a gray water tank or a portable system.
  2. Choose a water pump: Choose a pump suitable for your water needs and power source (12V or 24V).
  3. Water tank: Select a tank size based on your requirements and available space.
  4. Plumbing fittings and hoses: Ensure you have appropriate connectors, valves, and hoses for your specific system.
  5. Accumulator tank (optional): This helps regulate water pressure and reduce pump cycling.
  6. Electrical wiring and connectors, think carefully about your connections ans electricity and water are not a good mix so for safety, wrap all your wiring in trunking or protective waterfproof casing.
  7. Source appropriate tools: Screwdrivers, wrenches, pipe cutters, hose clamps, electrical tape, etc.
  8. Determine the placement of the water tank and pump. Common locations include under the van, inside cabinets, or beneath the bed platform.
  9. Consider access points for filling the tank and connecting external water sources if desired.
  10. Plan the routing of water lines and ensure they are easily accessible for maintenance or repairs.
  11. Determine the location of fixtures like sinks, faucets, and showers to determine the length and placement of the plumbing lines.
  12. Install the Water Tank:
  13. Clean the area where the tank will be placed.
  14. Use straps or brackets to secure the tank in position, ensuring it is stable and won’t move during travel.
  15. Connect the water tank to the fill port, vent, and overflow fittings.
  16. Install the Water Pump:
  17. Mount the pump securely in a location close to the water tank.
  18. Connect the pump to the water tank using appropriate hoses or pipes.
  19. Install a strainer or filter on the inlet side of the pump to prevent debris from entering the system.
  20. Install Plumbing Lines:
  21. Measure and cut the appropriate lengths of flexible water hoses or rigid pipes to connect the pump to the fixtures.
  22. Use hose clamps or connectors to secure the plumbing lines at each connection point.
  23. Route the plumbing lines through the van, following the planned path and ensuring they are properly supported and protected from potential damage.
  24. Install Fixtures:
  25. Install sinks, faucets, showers, and other fixtures at their designated locations.
  26. Connect the plumbing lines to the fixtures using appropriate connectors and fittings.
  27. Ensure all connections are tight and leak-free.
  28. Electrical Connections:
  29. Connect the positive and negative wires from the water pump to an appropriate power source, such as the van’s electrical system or a dedicated secondary battery.
  30. Use proper connectors, fuses, or circuit breakers to ensure safe and reliable electrical connections.
  31. Test and Inspect:
  32. Fill the water tank and turn on the pump to test the system.
  33. Check for leaks, both at the connections and within the plumbing system.
  34. Verify that the pump is functioning correctly and providing adequate water pressure.
  35. Secure and Protect:
  36. Secure loose components, ensure proper insulation and protection of the plumbing lines, and make any necessary adjustments or modifications.
  37. Consider using insulation or pipe sleeves to prevent freezing in cold weather conditions.
  38. As with any plumbing or electrical work, it’s recommended to have a basic understanding of these systems or seek the assistance of a professional if you’re unsure about any aspect of the installation process. Additionally, always follow safety guidelines and local building codes when working on your campervan conversion.

Interior Construction

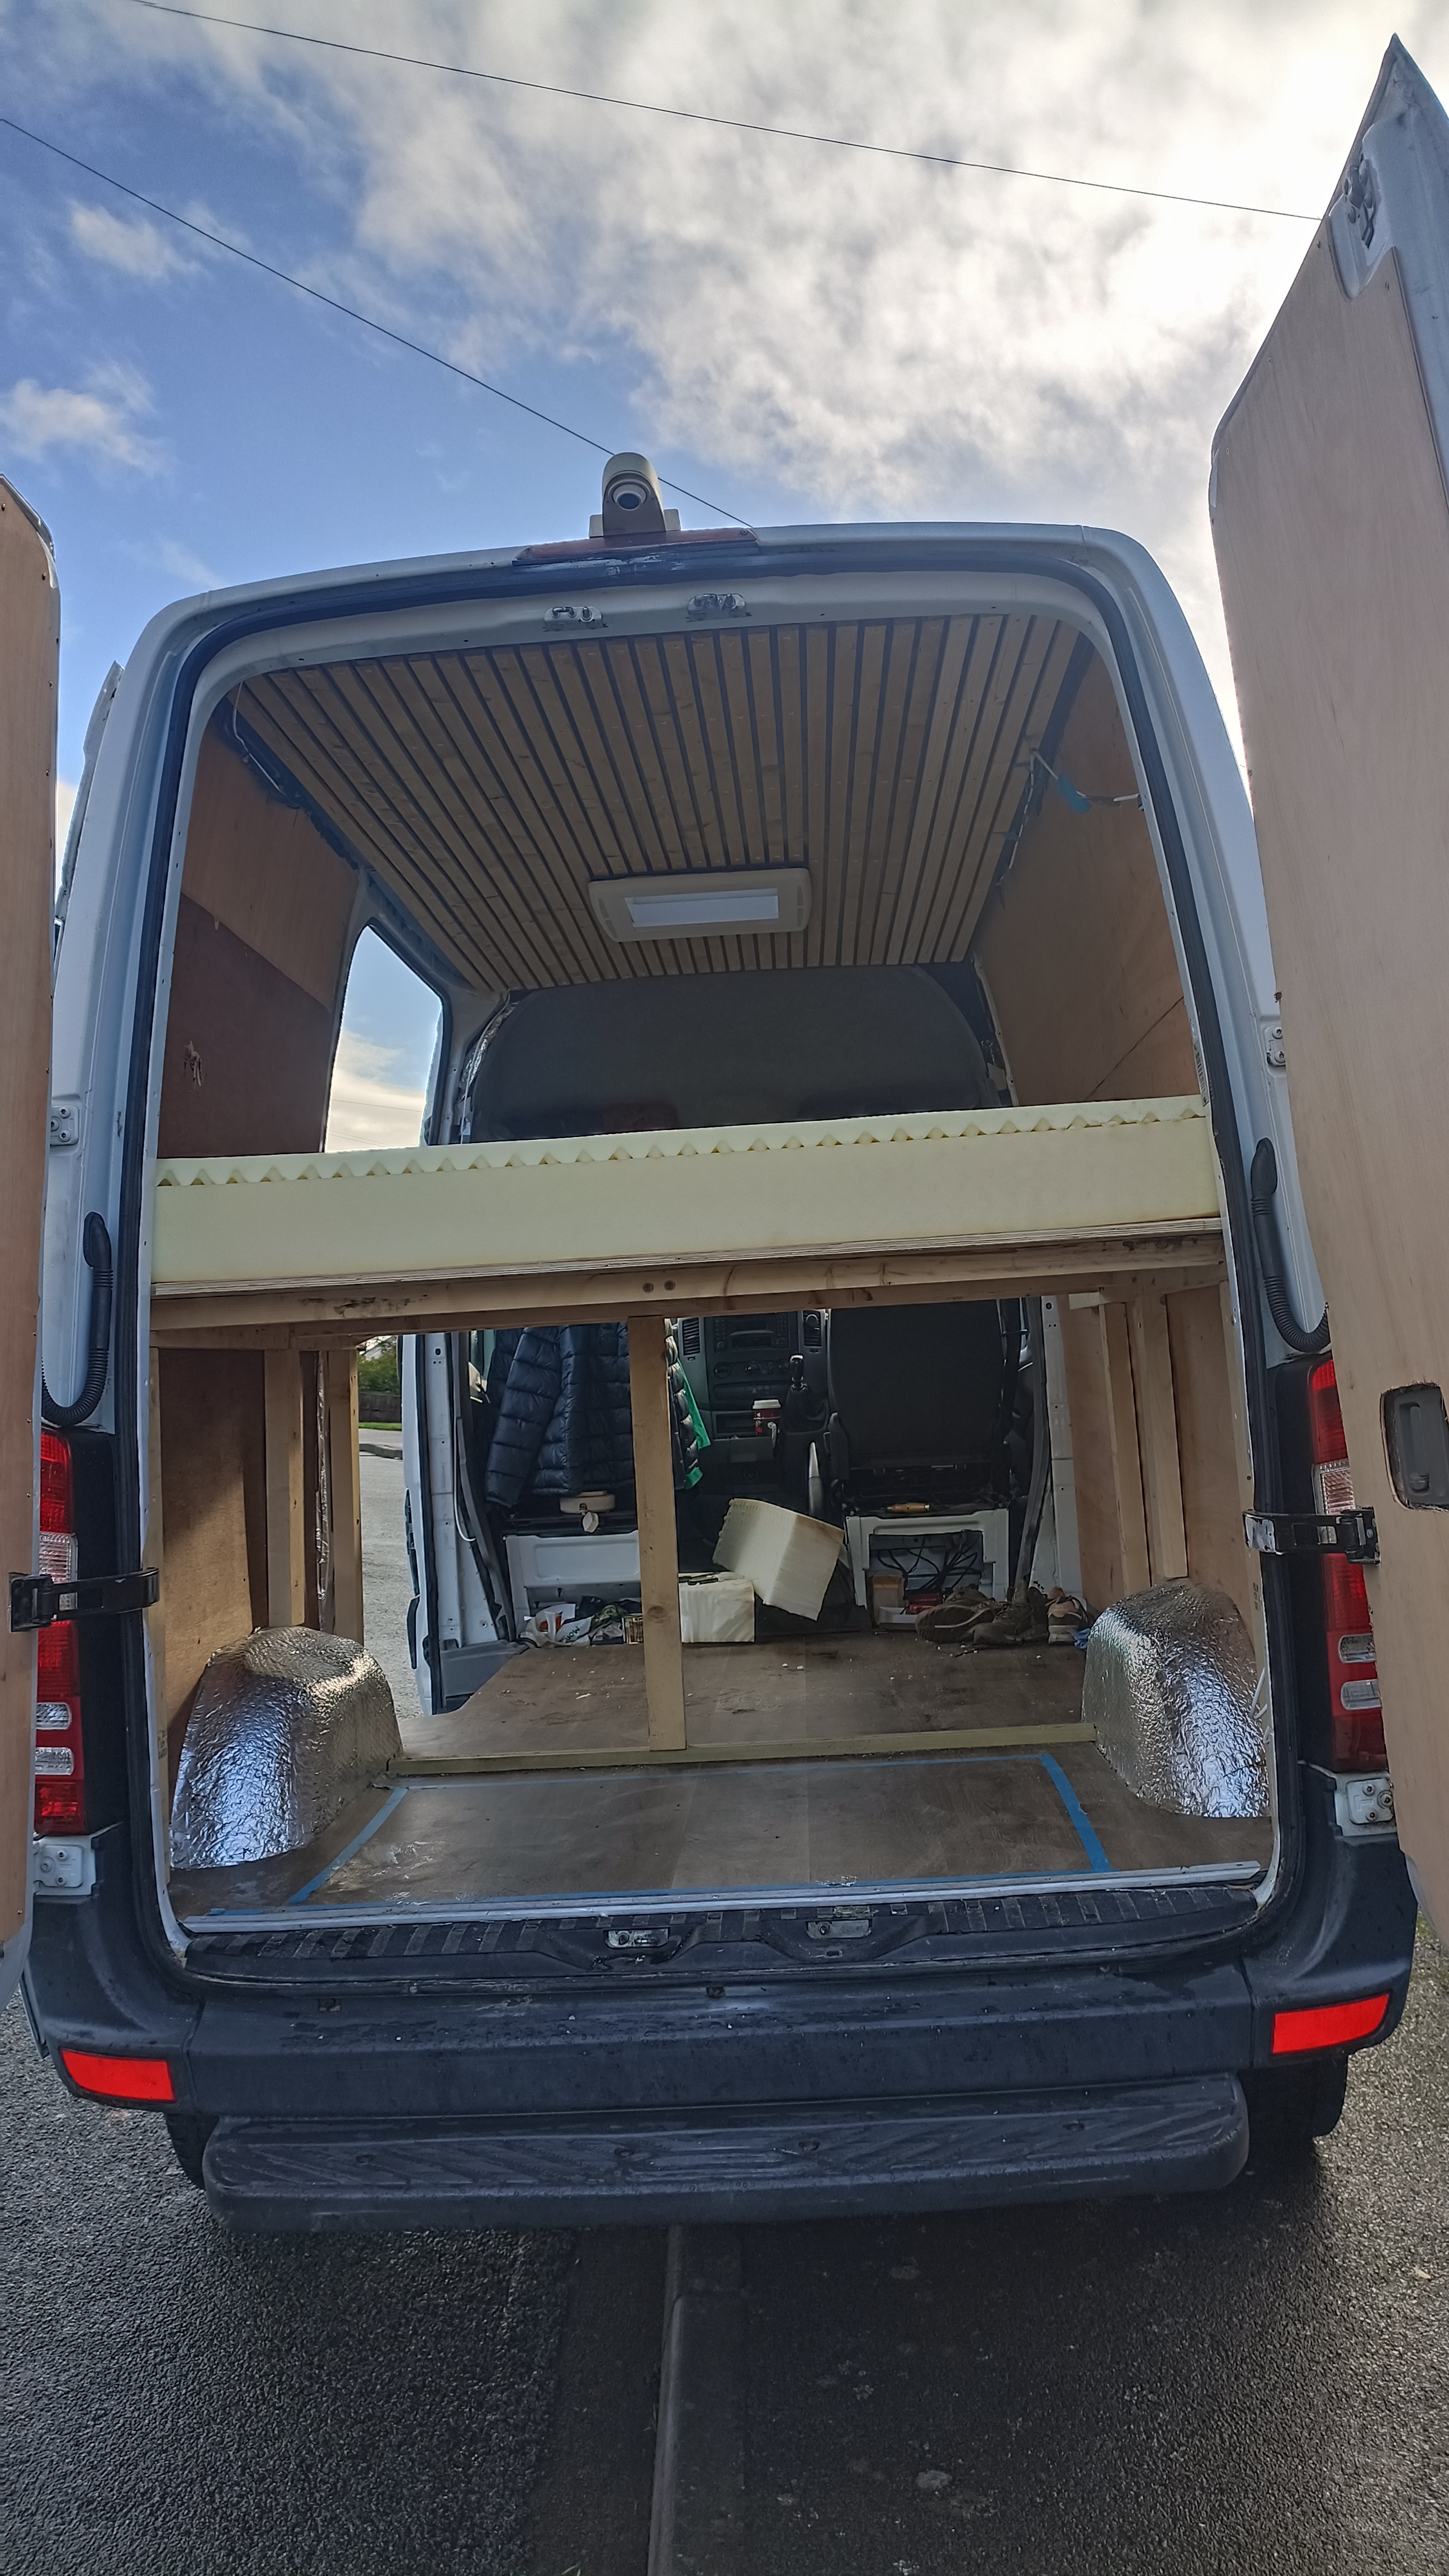
Flooring, Walls, and Ceiling:

  • Choose and install the flooring material, such as vinyl, laminate, or hardwood.
  • Cover the walls and ceiling with suitable materials, such as wood paneling, fabric, or insulation boards.
  • Ensure proper insulation and moisture barriers are in place. I used DoDo sound deadending in the middle of my panels to quieten sound resonation. Then added a layer of cellotex insulation boarding for the big side panels and roof. For the little holes and awkward bits I used rock wool and sheep’s wool. I put ply boarding up to mount my cupboards with a support frame and then class them in plastic cladding.

Cupboards, Furnishings and Appliances:

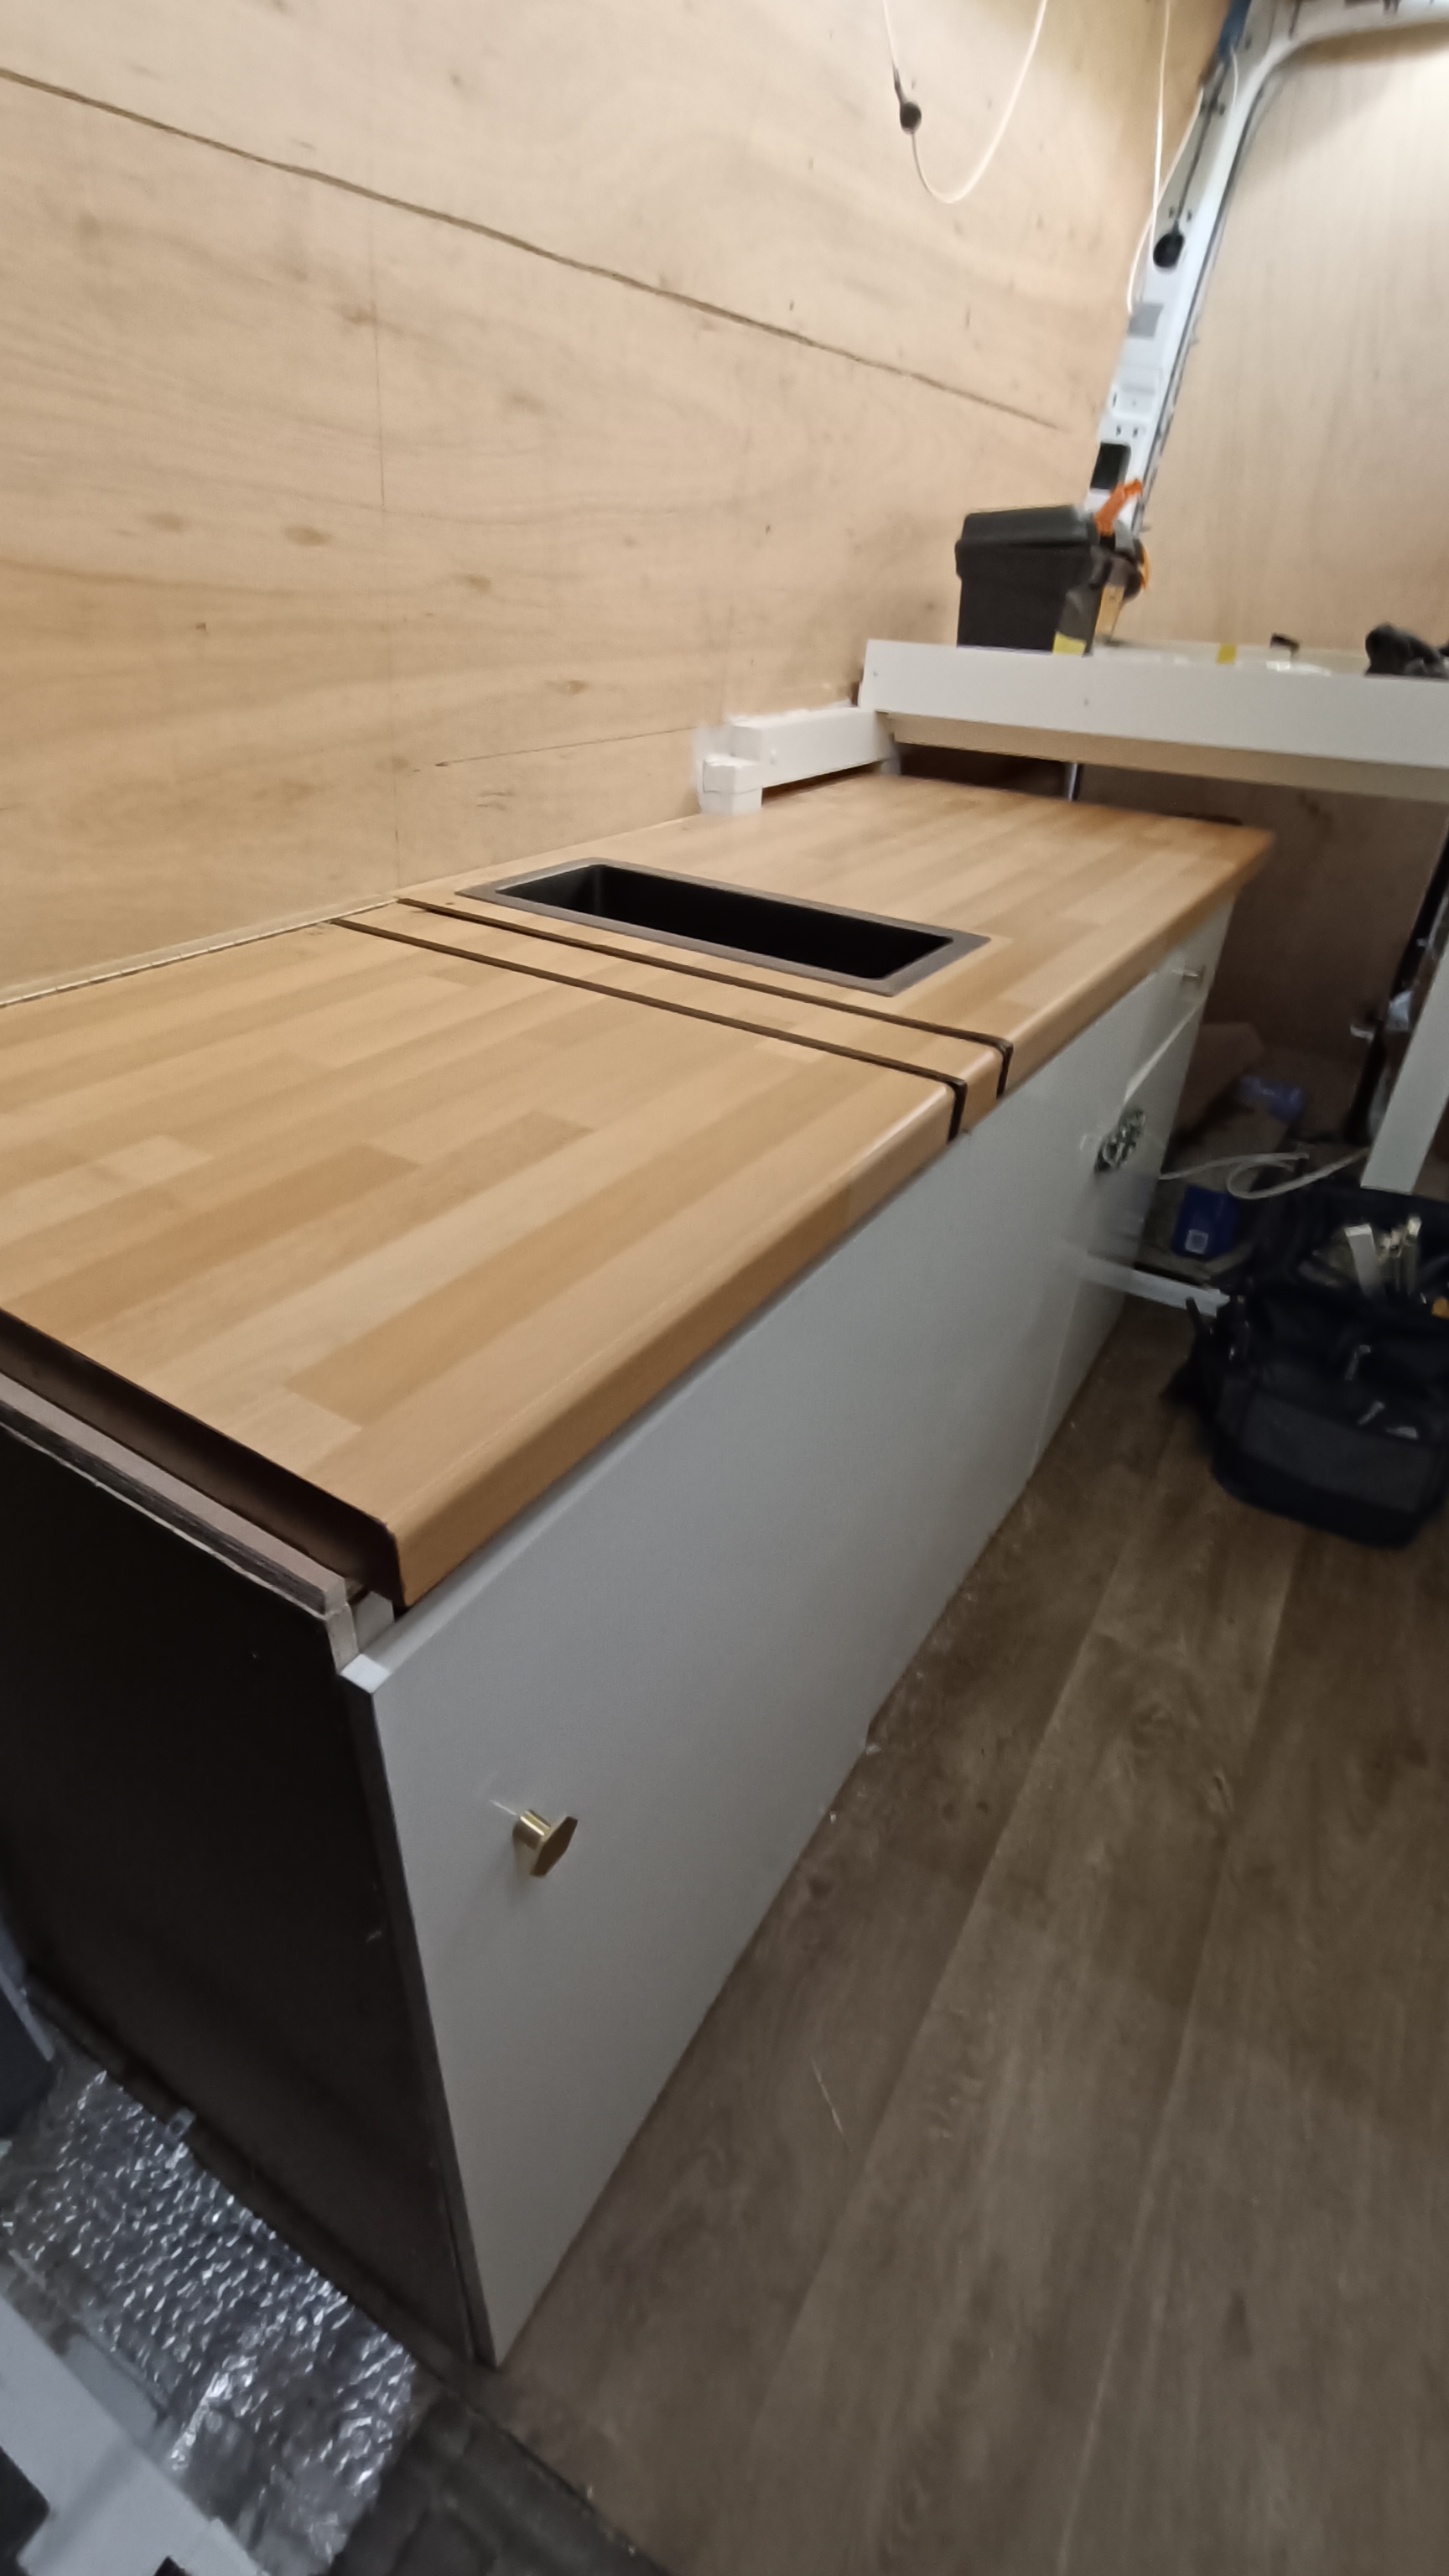
Building cupboards, furnishings, and installing appliances in a van conversion can be a challenging but rewarding process. Here is a general guide to help you get started:

Planning and Design:

  1. Measure the available space in your van and create a detailed layout plan.
  2. Determine the specific items you want to include, such as cupboards, bed frame, seating area, kitchenette, and appliances.
  3. Consider the overall weight distribution and ensure that it’s balanced for safe driving.
  4. Materials and Tools:
  5. Choose suitable materials that are lightweight, durable, and suitable for a mobile environment. Common choices include plywood, hardwood, and lightweight composite materials.
  6. Prepare necessary tools such as a saw, drill, screws, measuring tape, level, and clamps.
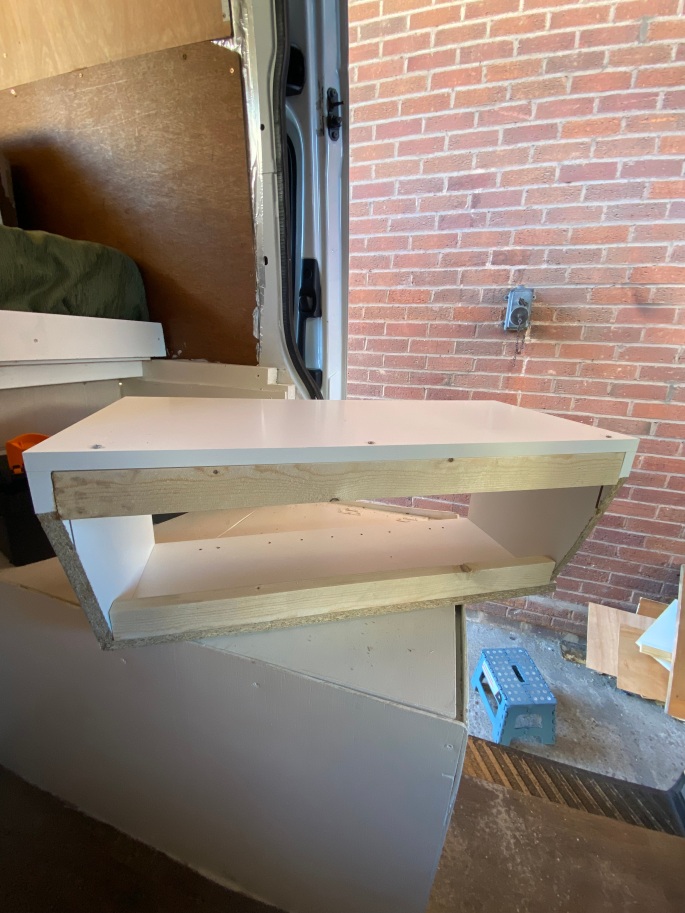
  7. Building Cupboards and Furnishings:
  8. Start by constructing the framework for the cupboards and furnishings using your chosen materials. Ensure the framework is sturdy and properly anchored to the van’s walls or floor.
  9. Cut and attach panels to create the sides, back, and doors of the cupboards. Use appropriate hinges for the doors.
  10. Install shelves or drawers inside the cupboards based on your storage needs.
  11. Secure the cupboards to the van’s structure using brackets or screws, ensuring they are safely attached and won’t move during transit.
  12. Build other furnishings like a bed frame, seating area, or dining table using similar construction techniques.
  13. Installing Appliances:
  14. Choose appliances that are suitable for the size and power supply of your van. Common appliances include a fridge, stove, sink, and water system.
  15. Determine the best location for each appliance, considering factors such as ventilation, accessibility, and weight distribution.
  16. Install any necessary plumbing or electrical connections, ensuring they are properly sealed and secure.
  17. Anchor appliances securely to the van’s structure using brackets or straps to prevent movement during travel.
  18. Finishing Touches:
  19. Sand and paint the cupboards and furnishings to achieve the desired aesthetic.
  20. Consider adding finishing touches like handles, knobs, or decorative elements to personalize the space.
  21. Install flooring, wall paneling, and ceiling materials to complete the interior.

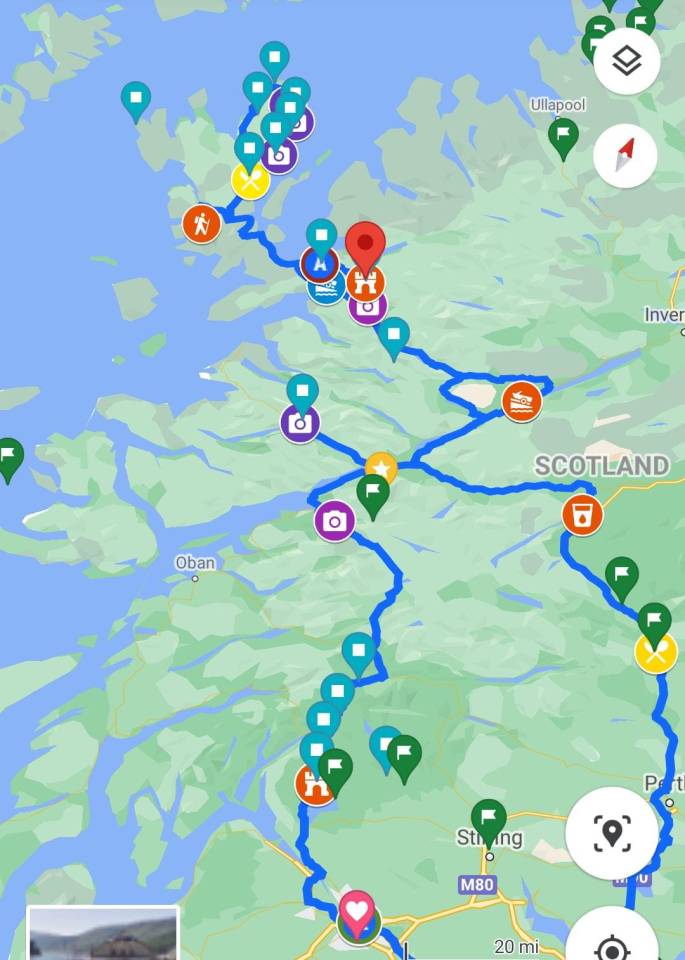
I hope you have enjoyed reading some advice and guidance of how to build a van from this helpful guide. If you have any further questions please feel free to comment below or message me on my instagram under @vanlifewithluci.

Disclaimer: All advice on this blog is given by a non professional van builder (myself) and I would highly advise if you are undertaking a project like this as an amature DIYer to consult with professional advisers, especially on the electronics and plumbing parts of your van to ensure safe installation.

Why give up your life to live in a van?

Over the past there has been a lot of change and I’ve been asked this question so many times I could have brought another van by now!

Here’s my honest answer to a simple question why stop your life as you know it to move into a metal box on wheels?

For me it wasn’t so dramatic as all that. I had been living in vans part time for years with hoildays and travelling periods of 1-4 months at a time. I had gone part time teaching so travel more out of a van doing placements as a supply teacher and short term management roles. I kept photography jobs on the side like weddings and events to roll in extra money for these trips and pay for a house and a van! So to give up an expense of a house felt like a relief, a pressure off to be honest. To have a van to live in all the time didn’t seem so scary. It quickly becomes the norm to say hey let’s head back to the van instead of back the house, I call them both home.

I got rid of possession but giving things to charity or selling them. It was amazing what I had accumulated over 15 house moved and many rented homes. Pretty much two of everything and again even though it was sad to see things go at times it felt like the shedding of a skin. A dead outgrown layer of me peeled off with clothes that don’t fit anymore or

Why turn to a Nomdic lifestyle?

Apricating a sunset in Switzerland at the famous Château de Chillon

Dear fellow seekers of freedom and wanderers of the soul, today I beckon you to dive headfirst into the captivating realm of nomadic vanlife. As the world becomes more complex and intertwined, the allure of simplicity and unencumbered exploration tugs at our weary hearts. In this article, I implore you to cast aside the shackles of societal norms, embrace the uncharted roads, and unlock a life defined by adventure, self-discovery, and boundless possibilities.

Pic: Learning to wild swim in the fjords of Norway on a roadtrip in 2020

Liberation from the Mundane: Let us first acknowledge the mundane existence that engulfs our everyday lives—the predictable routines, the ceaseless commutes, the monotonous nine-to-five. The nomadic vanlife lifestyle serves as the ultimate antidote to this suffocating banality. It’s a liberation from the humdrum existence that shackles us to a single place, allowing us to redefine what it means to truly live. I have used my time travelling to focus on enhancing my mental healthy by living more slowly and simply. I spend time reading, exercising through my hobbies like swimming, hiking, paddle boarding and mountain biking. I have also had time to spending time sharing my photography and creating content to share with others.

Pic: Appricataing the blue and white ice whilst hiking glaciers in Norway and New Zealand.

Unravel the Tapestry of Nature: In the grand tapestry of our world, there are landscapes waiting to be explored, hidden corners begging to be discovered. By choosing the nomadic vanlife, you become intimately acquainted with the Earth’s wonders. Imagine waking up to the resplendent hues of a desert sunrise or falling asleep beneath a star-studded sky in the heart of a pristine forest. Nature becomes your ever-changing companion, offering solace, inspiration, and a profound connection to the world around you.

Pic: Hiking in Italy and taking the trails less travelled to catch those spectacular summit views.

Embrace the Unscripted Narrative: One of life’s greatest treasures lies in the unexpected, in those serendipitous moments that transcend our meticulously planned existence. Nomadic vanlife epitomizes the art of embracing the unscripted narrative. Every twist and turn in the road presents new encounters, chance encounters with kindred spirits, and stories waiting to unfold. From impromptu campfires with fellow nomads to stumbling upon hidden gems tucked away in the folds of an unfamiliar landscape, the vanlife journey thrives on spontaneity.

Pic: Playing guitar in the van. By having more time to play and write music over the past few years has been something that has been so wonderful ad a way to meet new people. Music is it’s own language that cross so many social and cultural boarders when travelling.

Reclaim Your Time: In a world governed by schedules and deadlines, time slips through our fingers like sand. Nomadic vanlife enables us to reclaim this precious resource, granting us the freedom to chart our own course. The van becomes our sanctuary, a mobile oasis where we dictate the ebb and flow of each day. Whether you choose to immerse yourself in creative pursuits, pursue personal growth, or simply relish in the blissful art of doing nothing, the vanlife lifestyle affords you the gift of time, unfettered and untamed. For me having more it has also allowed me to make a channel to share my adventures which has led to a new career, friends and travel. It has been especially enriching to my life to develop personally in a community of people who were all brought together by a passion with the outdoors has been so life enriching over the past few years.

Cultivate Authentic Connections: As we wander from place to place, we forge connections that transcend borders, language barriers, and cultural differences. The nomadic community is a tapestry of like-minded souls who share a passion for exploration and a desire to live life on their terms. From spontaneous gatherings at picturesque campsites to shared tales of triumph and adversity, the bonds formed on the road are authentic, profound, and enduring. It’s through these connections that we find solace, support, and a sense of belonging, transcending the limitations of physical spaces.

So, dear dreamers and seekers, I implore you to heed the call of the open road. Embrace the nomadic vanlife lifestyle and embark on a journey that will forever alter the trajectory of your existence. In the pursuit of freedom, self-discovery, and unbounded joy, the road beckons, ready to reveal its secrets. Release yourself from the shackles of the mundane, unravel the tapestry of nature, and embrace a life defined by the unscripted, the authentic, and the extraordinary. The nomadic vanlife awaits you, eager to unlock the boundless possibilities that lie just beyond the horizon.

Pros and cons of VANLIFE

The Pros and Cons of Van Conversions: Exploring the World of Mobile Living

In recent years, the concept of van conversions has gained popularity as an adventurous and affordable way to embrace a nomadic lifestyle. By transforming a humble van into a functional living space, individuals and families have the freedom to travel, explore, and experience the world on their terms. While van conversions offer numerous advantages, it’s important to consider both the pros and cons before embarking on this unique journey. In this blog, we’ll delve into the benefits and drawbacks of van conversions, that I have learnt through my experience of converting vans and spending time living and traveling and working from them to help give you a rounded picture about this unconventional lifestyle.

Pros of Van Conversions:

  1. Freedom and Flexibility: One of the most significant advantages of a van conversion is the freedom it provides. You have the flexibility to go wherever you desire, changing your surroundings whenever you please. From picturesque mountains to serene beaches, your home-on-wheels allows you to wake up to breathtaking views and explore remote destinations at your leisure. This freedom to roam is particularly appealing to those seeking adventure and a break from traditional lifestyles.
  2. Cost-Effectiveness: Compared to traditional housing options, van conversions offer a cost-effective alternative. While the initial investment in purchasing and converting a van can vary, it often proves more affordable in the long run. Van living eliminates expenses such as rent or mortgage payments, property taxes, and utility bills. By minimizing your financial obligations, you can allocate your funds towards travel experiences, personal development, or saving for future endeavors.
  3. Minimalism and Sustainability: Embracing a van lifestyle encourages minimalism and sustainability. Limited living space prompts individuals to prioritize essentials and detach from material possessions, fostering a simpler and clutter-free existence. Moreover, with the integration of eco-friendly technologies like solar panels, composting toilets, and efficient energy systems, van conversions enable a reduced environmental footprint, making it an appealing choice for environmentally conscious individuals.
  4. Connection with Nature: Living in a van offers unparalleled access to nature. With the ability to park in scenic campsites, national parks, and off-grid locations, van dwellers have the opportunity to immerse themselves in the beauty of the great outdoors. Whether it’s waking up to the sound of birdsong, stargazing under a clear sky, or embarking on nature hikes, van conversions facilitate a close connection with the natural world, promoting well-being and a sense of tranquility.

Cons of Van Conversions:

  1. Limited Space: One of the main challenges of van living is the limited space. Converting a van into a livable space necessitates careful planning and efficient use of every square inch. While creative storage solutions can help optimize space, it may still feel cramped, especially for those accustomed to spacious homes. Living in a small area requires adaptability and organizational skills to avoid clutter and maintain a comfortable living environment.
  2. Lack of Amenities: Compared to conventional homes, van conversions often lack certain amenities. Although you can incorporate basic facilities such as a kitchenette, bed, and bathroom, these amenities are typically compact and may not offer the same level of convenience as a traditional home. Limited water storage, absence of a fixed address for mail delivery, and reliance on public restrooms or showers can pose challenges and require adjustments to daily routines.
  3. Social Isolation: While van living offers solitude and tranquility, it can also lead to social isolation. Constantly being on the move may limit opportunities to form long-lasting connections with local communities. Extended periods away from family and friends can be emotionally challenging for some individuals. Maintaining a sense of belonging and building a supportive network requires intentional efforts, such as attending meetups or utilizing online platforms to connect with fellow van dwellers.
  4. Practical Considerations: Living in a van requires a certain level of adaptability and problem-solving skills. From finding suitable parking spots to dealing with mechanical breakdowns, there are practical considerations to keep in mind. Weather conditions, security concerns, and maintenance of the van also require regular attention. It’s important to be prepared for unforeseen challenges that may arise during your journey and have a contingency plan in place.

Van conversions offer a unique and adventurous lifestyle that attracts those seeking freedom, cost-effectiveness, and a closer connection to nature. However, it’s crucial to weigh the pros and cons before embarking on this unconventional journey. While the freedom, flexibility, and minimalistic appeal of van living can be enticing, challenges such as limited space, lack of amenities, social isolation, and practical considerations must also be considered. By carefully evaluating your priorities, preferences, and willingness to adapt, you can determine whether van conversions are the right fit for your desired lifestyle.

Norway – Travel Guide

Norway offers a unique and unforgettable travel experience, with something for everyone. Whether you’re looking to explore nature, learn about history and culture, or simply relax and enjoy the beautiful scenery, Norway is definitely worth a visit. The country is renowned for for its breathtaking natural beauty, with stunning fjords, mountains, and glaciers. The northern lights are also a popular attraction, especially during the winter months due to location inside the Artic Circle and it’s dark night skies.

Norway offers a wide range of outdoor activities, including hiking, skiing, snowboarding, fishing, kayaking, and more. With its vast wilderness areas and extensive trail networks, Norway is a paradise for outdoor enthusiasts. Norway has a rich cultural and historical heritage, with many museums, art galleries, and historic landmarks. From the Viking Age to modern times, Norway’s history is fascinating and worth exploring. The country is also at the forefront of sustainable Tourism, with a commitment to preserving its natural and cultural resources for future generations. Visitors can enjoy eco-friendly accommodations, tours, and activities that are both responsible and enjoyable which lots of access to free camping, free facilities like toilets and showers it was very campervan friendly. Norway is known for being one of the safest countries in the world. Crime rates are low, and the country has a stable political climate. Visitors can enjoy peace of mind and focus on exploring and having fun.

So if you are thinking about heading somewhere different this year. Here are the top ten places to see in Norway.

  1. Bergen – a picturesque city on the west coast of Norway known for its colorful houses, fish market, and funicular railway, check out the old town with its wooden buildings and twisty turning streets (Pictured below).
  1. Oslo – the capital city of Norway with many cultural attractions, including museums, parks, and historic landmarks. This is the palace and important civic buildings as Norway has a long regency of kings and queens.
  1. Geirangerfjord – a breathtaking fjord with snow-capped mountains, cascading waterfalls, and crystal-clear waters.
  1. Sognefjord – the longest and deepest fjord in Norway, surrounded by steep mountains and lush green valleys.
  1. Tromsø – a city in northern Norway known for its stunning northern lights, as well as outdoor activities like dog sledding, skiing, and snowmobiling.
  1. Lofoten Islands – a group of islands known for their dramatic landscapes, fishing villages, and unique flora and fauna.
  1. Preikestolen – a cliff located in southwestern Norway that provides stunning views of the Lysefjord.
  1. Flåm Railway – a scenic train journey through the mountains and fjords of Norway.
  1. Stavanger – a coastal city with a charming old town, bustling harbor, and easy access to the Lysefjord.
  1. Jotunheimen National Park – a vast wilderness area with mountains, glaciers, and alpine lakes that is popular for hiking and outdoor activities.

Driving around Norway can be an incredible adventure, I spent over 2 months touring around Norway from the end of June to August to enjoy the warm summer months. Which average 22-30 degrees and have lots of daylight hours. I drove from the UK via the hook of Demark and crossed the Toll bridge to cross into northern Europe but car ferries can also be taken. I just fancied the adventure of also visiting Sweden and Denmark on route to Norway. By driving all around the countryside you have unprecedented access to its wild landscapes with stunning scenery at every turn in Norway, here’s a road trip guide for driving around Norway:

  1. Start in Oslo – the capital city of Norway, where you can explore the city’s museums, parks, and historic landmarks before heading out on your road trip.
  1. Head west to Bergen – a picturesque city on the west coast of Norway with its colorful houses, fish market, and funicular railway.
  1. Drive through the fjords – Norway is known for its stunning fjords, including Geirangerfjord, Sognefjord, and Hardangerfjord. Drive through these natural wonders and take in the breathtaking scenery.
  1. Explore the Lofoten Islands – take a ferry from Bodø to the Lofoten Islands and explore these stunning islands known for their dramatic landscapes, fishing villages, and unique flora and fauna.
  1. Drive to the North Cape – drive to the northernmost point of mainland Europe, the North Cape, and take in the stunning views of the Arctic Ocean.
  1. Visit Tromsø – a city in northern Norway known for its stunning northern lights and outdoor activities like dog sledding, skiing, and snowmobiling.
  1. Drive along the Atlantic Ocean Road – a scenic road along the coast of Norway that passes over small islands and bridges with stunning ocean views.
  1. Explore the Jotunheimen National Park – a vast wilderness area with mountains, glaciers, and alpine lakes that is popular for hiking and outdoor activities.
  1. Finish in Trondheim – a historic city on the west coast of Norway with a charming old town and stunning cathedral.

Remember to plan your road trip in advance, especially during the winter months when driving conditions can be challenging. Make sure to have appropriate gear, such as snow tires and chains, and check road conditions before heading out. Finally, always drive carefully and be respectful of the environment and local communities.

If you are planning to hire a vehicle and fly out Norway has several international airports, including Oslo Airport, Bergen Airport, and Stavanger Airport. From the airport, you can take a taxi, bus, or train to your destination, or hire a car. Here are some things to keep in mind when renting a car in Norway:

  1. Age Restrictions: You must be at least 19 years old to rent a car in Norway, and some rental agencies require drivers to be 21 or older.
  2. Driving License: You will need a valid driver’s license from your home country to rent a car in Norway. If your driver’s license is not in English or a Scandinavian language, you may need to obtain an International Driving Permit (IDP) before you arrive in Norway.
  3. Insurance: It’s important to make sure you have adequate insurance coverage when renting a car in Norway. Basic insurance is typically included in the rental price, but you may want to consider purchasing additional coverage for peace of mind.
  4. Winter Driving: If you’re planning to rent a car in Norway during the winter months, it’s important to be prepared for snowy and icy conditions. Make sure your rental car is equipped with winter tires and that you have experience driving in these conditions.
  5. Toll Roads: Many roads in Norway have tolls, and some rental agencies may charge an additional fee for processing these tolls. Make sure you understand the toll system and any associated fees before you hit the road. I used the online toll system to register my van, drove around and the amount was itemised into a bill at the end of the month which i could then have deducted from directly from my bank account. Toll roads are clearly labelled.
  6. Fuel Costs: Fuel costs in Norway are higher than in many other countries, so be prepared for this expense if you’re planning a long road trip. Car ferries are also frequent and mostly used in the Fjordlands to reach popular areas like Prekstolen for the famous hike. So be sure to check you sat nav to see what routes include ferries.
  7. Navigation: Norway’s roads can be difficult to navigate, especially in remote areas. Make sure you have a reliable GPS or map system to help you find your way.

If you have enjoyed this blog please feel free to support my writing efforts and buy me a coffee here or donate to adventure fuel costs here. Any donations are really appreciated so thank you very much and feel free to subscribe and check out my other articles.

Vanlife Italy

Vanlife Italy

Vanlife around Italy has become increasingly popular in recent years as more and more people are embracing the freedom and adventure that comes with living on the road. With its beautiful landscapes, rich history, and delicious cuisine, Italy is the perfect destination for vanlife enthusiasts who want to explore the country at their own pace. In this article, we’ll take a closer look at vanlife around Italy and everything you need to know before embarking on this exciting adventure. I spent over 7 weeks touring around this beautiful country and wanted to share my experiences with you.

Why Choose Vanlife In Italy?

Italy is a country that is full of surprises, from stunning mountain ranges to rolling hills covered in vineyards, and of course, the picturesque coastlines. With so much to see and do, it’s no wonder that vanlife in Italy is becoming more popular every year. Here are some of the top reasons why you should consider vanlife around Italy:

Flexibility: Vanlife gives you the freedom to go wherever you want, whenever you want. You can wake up in the morning and decide to explore a new city, or head out to the countryside for a hike. With a van, you have the ultimate flexibility to create your own itinerary.

Cost-effective: Vanlife is a great way to save money on accommodation and transportation costs. Instead of paying for expensive hotels or train tickets, you can sleep and travel in your own van, which can be much more cost-effective in the long run.

Adventure: Vanlife is an adventure in itself, and Italy is the perfect place to experience it. Whether you’re hiking in the Dolomites, exploring the beaches of Sicily, or visiting historic cities like Rome and Florence, vanlife in Italy is sure to be an unforgettable experience.

Where To Visit In Italy?

Italy has a lot to offer for vanlifers, from beautiful beaches to stunning countryside and ancient cities. Here are some top attractions to visit in Italy for vanlifers: One of the great things about vanlife in Italy is that there are so many places to explore. Here are some of the top destinations that you should consider adding to your itinerary:

Tuscany: Tuscany is one of the most popular regions in Italy and for good reason. With its rolling hills, picturesque villages, and world-famous cuisine, Tuscany is the perfect place to experience the beauty of Italy. Be sure to visit the cities of Florence and Siena, and don’t miss the opportunity to explore the Chianti wine region.

Dolomites: The Dolomites are a mountain range in northeastern Italy and are known for their stunning scenery and world-class hiking trails. Be sure to visit the towns of Cortina d’Ampezzo and Bolzano, and don’t miss the opportunity to hike to the Tre Cime di Lavaredo, one of the most iconic peaks in the Dolomites.

The Amalfi Coast: Drive along the winding roads of the Amalfi Coast, stopping at picturesque towns such as Positano, Amalfi, and Ravello. Enjoy stunning sea views, take a dip in the clear waters, and indulge in delicious Italian cuisine.

Rome: Discover the ancient city of Rome, home to iconic landmarks such as the Colosseum, the Pantheon, and the Vatican. Park your van and explore the city on foot, soaking up the history and culture of this fascinating place.

Cinque Terre: Visit the picturesque villages of the Cinque Terre, located on the rugged Ligurian coast. Walk along the stunning coastal trails, admire the colorful houses, and sample the local seafood.

Lake Como: Enjoy the stunning scenery of Lake Como, surrounded by mountains and picturesque towns. Park your van and take a boat tour of the lake, visit the beautiful gardens and villas, and sample the local cuisine.

Sicily: Explore the beautiful island of Sicily, with its stunning coastline, ancient ruins, and delicious cuisine. Visit the cities of Palermo and Catania, and enjoy the laid-back island lifestyle.

Venice: Experience the unique city of Venice, with its beautiful canals, historic landmarks, and charming streets. Park your van and explore the city on foot, taking in the sights and sounds of this magical place.

Pompeii: Visit the ancient city of Pompeii, which was buried by the eruption of Mount Vesuvius in 79 AD. Walk through the well-preserved ruins, imagining what life was like in ancient times.

Sardinia: Enjoy the beautiful beaches and crystal-clear waters of the island of Sardinia. Park your van and explore the coastline, visit the charming towns, and sample the local seafood.

Florence: Visit the beautiful city of Florence, with its stunning architecture, world-class museums, and delicious food. Park your van and explore the city on foot, taking in the art and culture of this historic place.

Top Tips For Italian Vanlife

Before you hit the road in Italy, there are a few things you should keep in mind to make your vanlife experience as smooth as possible:

Plan your route: While it’s tempting to just hit the road and see where it takes you, it’s a good idea to plan your route ahead of time. This will help you make the most of your time in Italy and ensure that you don’t miss any must-see destinations.

Wild camping: Parking overnight can be difficult in certain hotspots epically in the Dolomites where there is an increased police, mountain park authority presence. My advice would be to check out or book campsites in advance. I would personally recommend Family Camping Vidor as it also had access to the wellness spa included in the standard overnight price for a pitch. Access to the sauna, swimming pool, flume rides and an outdoor thermal pool with stunning 360 views of the mountains is all included in your overnight stay. All for the grand price of £18 per night for the van.

The rest of the trip around Italy I used ParkForTheNight app and found locations away from main roads and large public car parks and had no trouble at all for 7 weeks.

Food: In the north in the mountains supermarkets were rare and I would advise using Lidl as it is cheaper than Carefour Expresses with a wider assortment of fresh fruit and vegtables. In the middle of Italy there is a large range of food and culinary choice. In the rustic south fresh olives, cheese, lemons and farmers will often have stalls on their property or by the roadside with an honesty box system. This can be a wonderful way to experience local foods. Essential Italain foods to try include: Carbonara – This dish is made with spaghetti, egg yolks, Pecorino Romano cheese, black pepper, and guanciale (a type of cured pork cheek). It’s creamy, rich, and incredibly delicious.

Pizza – Rome is known for its thin and crispy pizza crust. Try the classic Margherita pizza, which is topped with tomato sauce, mozzarella cheese, and fresh basil.

Supplì – This is a typical Roman street food. It’s a fried rice ball filled with mozzarella cheese, tomato sauce, and sometimes ground beef. It’s crispy on the outside and gooey on the inside.

Saltimbocca alla Romana – This dish consists of thin slices of veal topped with prosciutto and sage, then cooked in white wine and butter. It’s savory and full of flavor.

Gelato – You can find gelato shops all over Rome. It’s a creamy and delicious Italian ice cream that comes in a variety of flavors. Try the pistachio or stracciatella flavors for a classic taste.

Cacio e Pepe – This is a simple but delicious pasta dish made with spaghetti, Pecorino Romano cheese, black pepper, and a little bit of pasta water to create a creamy sauce.

Tiramisu – This is a classic Italian dessert made with ladyfingers dipped in espresso, layered with mascarpone cheese and dusted with cocoa powder.

Make sure to also try some of the local wines, such as Frascati or Chianti, to complete your culinary experience.

Roads: Italy has 35 motorways that use tolls, they can vary in price depending on the region, who runs the tolls, length of the road, and what type of vehicle you have. According to Autostrade, it costs a standard family car around €12 per 100 km travelled on a toll road. There are regular booths where you can pay using card mostly and less cash and human operated booths. You can also buy a prepaid card and top it up at tabacca shops or online I believe, however I only ever used the pay and go method using my debit card.

Money: I always use a prepaid moneycard like the one offered by the PostOffice click here. If you want to read up more about it on their websire. I have used it all my adventures over the past 5 years as it lasts a few years and currency can be changed using the app without a fee. Cards can be picked up and registered at the PostOfffice, just bring a form of idea with you. To activate it you will have to start it with an initial balance and then it can be topped up using the app, which you can link to your bank account. You will not be charged for using it abroad, only if you wish to take out an amount in cash from a cash machine. You will be given a pin number just like a normal bank card and you can tap with a limit up to £100.

I hope this article has given you some inspiration, helpful advice and travel tips for your next adventure. If you would like to know more feel free to email me any questions or comment below. You can also follow my adventures at @vanlifewithluci on Instagram. If you enjoyed this blog please feel free to contribute and sponsor me by buying me a coffee and contributing to my writing efforts by clicking here.

Review BLUETTI EB70 Portable Power Station (1,000W 716Wh)

I have been tasked over the past few months to review Bluetti EB70 Portable Power Station and testing it’s plethora of features. In this article, I will endeavor to explain, what it is? what it does? What accessories does it have?

Why use one?

Firstly let’s address why portable power station is such a good investment for your future adventures. It is perfect for portable charging, and a power unit is an essential piece of gear to keep all of your gadgets from small devices like satellite navigations to heaters working in all seasons. Whether you are going out on a road trip, wild camping, outdoor cooking, or working remotely, being able to charge your devices is important. If you have access to mains electrics with a camping spot on a campsite a backup battery system can be game-changing. The EB70 is a powerful bit of kit which allows days of power without recharging and has lots of multi-functional ports to charge different devices with minimum fuss and is perfect for adventures that are off grid and does not require a mains hook-up to work like a generator. The station has a clear display of how much power is left in the bank on the front when it is time to recharge the unit. It can be plugged into a mains power at home or using renewable solar energy by plugging in the optional PV120 PV200 (120w/200w) Solar Panels, which can be bought as additional accessories.

What can it power?

Almost everything! Over the past three months I have been stringently testing out it’s capacity with all my devices from laptops, cameras, projectors, kitchen devices and even an eclectic blanket for 8 hours whilst I slept. The unit has huge power possibilities with a 716 Wh capacity and 1000Watt rating with surge protection. It also has 230V AC outlets, ideal for a fridge, cooler box, and a compressor to blow up a camp bed or paddleboard. The EB70 also has 2 100Watt 2*5V/3A USBs great for charging your phone, head torch, and other small devices. The 2 regulated 12V/10A DC outputs also mean you can plug in ANY domestic-powered device such as a hairdryer, kettle, or kitchen appliance. 

How does it work?

The EB70 has a max capacity of 716wh, drawing upon its large internal battery. This means the power station can last for three days using my fridge and charging my other devices. It holds a charge well when not used and can be fully recharged in 3-4 hrs with solar panels (OCV 12-28V) or from a mains power supply at home. It can also get fully recharged from an AC wall outlet in 3-4 hrs or a 12V car port in 7-8 hrs. Bluetti’s technology is state of the art, with innovative designs in their products resulting in a compact power console. If you are worried about where to store the PV200 Solar Panels, with their 226cm long panels. Don’t worry, they easily fold down to a compact 59-60cm making the panels easy to pack away and transport inside your vehicle. The solar panels have an innovative design means it has carry handles and is kept neatly in their own carry case with foldable support arms to allow you to position the panels towards the sun.

Why Bluetti?

There are lots of companies offering power units across the market. However, Bluetti is head and shoulders above the rest with its innovative technology, designs, and affordable pricing. They offer a standard two-year warranty on their EB70s and a year warranty on the solar panels and have a great customer service system and online support if you get stuck with setting up or maintaining your device. 

If you have any further questions feel free to message me here or check out Bluetti’s website by clicking here for more information.

An Adventure Tour of Southern Wales

In partnership with Southern Wales

Are you looking for a fun filled weekend in the UK? Are you searching for beautiful landscapes, fun attractions that are all Vanlife friendly? Look no further as Southern Wales has it all! Read on to find out where to go and what to do in South Wales.


I started my adventure with a visit to the newly opened Phenoix Zip line, found at Zip World Tower in Aberdare. I stepped out of the van to see rolling green valleys and luscious peaked mountain tops as far as the eye could see. Zip World Tower is a thrill seekers’ haven. The site boasts the world’s fastest seated zip line, which is highly accessible. A minibus takes you to the top of Rhigos mountain and the zip line takes you back down to the visitors centre in no time at all. Due to its unique location in the old Tower Colliery, you are privy to the most spectacular views of the Brecon Beacons as you glide over the Llyn Fawr reservoir, soaring along at a thrill seeking 70mph. The course itself is split into two sections the first is over the res, and the second section has a top speed of 50 mph, as it is a shorter run and over a dense pine forest, both equally a pure adrenaline rush as you are fully exposed to all the elements suspended in mid air.


The beautiful site is locally staffed and run under the lease of the Zip World company, which has 5 sites nationally spread out across Wales. For me I am usually a little auspicious of free hanging heights, however, the harnesses and various checks all made me feel very safe. The experienced and energetic staff reassure you as they count in Welsh before sending you down the lines and over the valley. For me this was a must have experience to get my heart pumping. I loved soaring like a bird over the tree tops and I would highly recommend this experience for adults and children alike. There are height and weight restrictions, so please check ahead. All tickets can be found online at Zip World Tower’s website, for further information please click here.


Zip World Tower also offers photography packages, which allow you to have your special moments recorded and emailed directly to you on the same day. From here you can have pictures of the whole flight experience recorded from a body camera. I would recommend giving yourself two hours for the whole experience, then top it off by making a stop off at the Cegin Glo Bar and Bistro before you leave. The beautiful bar building is found next to the zip lines. From here you can enjoy an array of barista hot drinks and delicious foods, including an array of vegan and specialist options, all whilst watching people coming down the lines. You can also sit at the many tables outside if you have a dog with you and enjoy the panoramic mountain views as you enjoy a coffee.


A must see second stop is the locally run Penderyn Brecon Beacon Distillery, a short 15-minute drive away you will see the modern building just off the main road. The site also offers charging points for electric vehicles. Whether you are a Whisky newbie like myself or an aficionado of tastings, I would highly recommend the £11 tour of the factory to understand the process of creating malt whisky and the sheer labour of love that goes into every bottle. The site is thanks to the tapping of a natural well that sits underneath and the entrepreneurial spirit of a selected team, created what we see and know of the brand today. A wonderful success story, which can be toasted to at the two free tastings at the end of the tour. If you are like myself and driving, feel free instead take two sample bottles which can be enjoyed later on. The tours run in the afternoon, just make sure to call or book ahead using their website which can be found here.


A scenic short drive further south will bring y the Rhinogs Viewpoint, make sure to stop off at the viewpoint to soak in the stunning views there or at the Hende’r Mynydd Car Park. Heading towards Bwlch, if you fancy stretching your legs in this region which has a plethora of beautiful walks. There is a multitude of hikes which boast magnificent views and a diversity of mountain landscapes, like the Sky to Sea path near Nant -Y-Moel over the Bwlch Mountain, or take the A4093 to Llangeinor which is a conservation area to explore the local wildlife and fauna of the area.


I stopped off to see the Pen Pych Waterfall for some impressive views of the pine filled mountain slopes en route up to the fall. The trails have a range of difficulties and levels with both upper and lower trails. The well benched upper trail leads up to a 349-meter waterfall and there is accessible parking from the Pen Pych Valley Car park. Click here to follow the walking route I hiked.


After immersing myself in nature I wanted to explore some of the local towns and villages and headed further down the valley to the charming town of Treorchy. The high street has been developed and has bags of character from it’s multi flagged shops lining the high streets to it’s Welsh cobbled cute houses. There was an array of shopping available here and some quaint places to visit including the interesting history like Blackmill.

Wild camping is illegal in Southern Wales, and in an area of such outstanding beauty. I opted to check into a camping site called OurWelsh Caravan and Camping. A laid back campsite with welcoming hot showers, friendly staff who gave us lots of advice and recommendations for the local area which was handy to explore locally. You can also find them on instagram on @ourwelsh. I choose the Llangeinor Arms for dinner, whose resplendent 360 views of the Welsh valley from their glass conservatory were such a joy to experience for a sunset dinner of high-quality dining and great service. The menu was diverse and boasted locally farmed produce and had lots of vegetarian and vegan options.


After an overnight camping stop in Bridgend. I head South to Rest Bay in Porthcawl to enjoy the beach and spectate some of the British Longboard 2022 Champions being held that weekend. Surf, bodyboard and wetsuit hire can all be had from the Visitors Centre, which also has outdoor showers and a fantastic restaurant with a balcony view over the sandy bay. At high tide, you can watch the surfers play in the waves whilst enjoying some tasty light bites and in the afternoon they have a takeaway cafe run from downstairs for coffees, burgers and ice creams.

Rest Bay itself is a playground for kite surfing, surfing and paddleboarding, there is also a beautiful promenade, from which you can cycle or walk down to view the pebble strewn beaches and coves which hug this craggy coastline.


Away from the Seafronts, you can explore the Merthyr Mawr Nature Reserve. On route try to stop off at the famous swing bridge, I would also suggest a stop off at the Merthyr Mawr village itself to see the peacocks roaming around the thatched cottages. Head down the single track lanes to the forest’s main park to see the ruins of Candleston Castle which is just off the main visitor’s car park. Then take a saunter in the sand over some of Europe’s largest coastal dunes including the famous Big Dipper.


Further down the coast, you’ll find the dynamic Dunraven Bay part of the Southern Down in the Vale of Glamorgan, which is famous for it’s fossil hunting and a fabulous day out for any geology enthusiasts. The large bedrock beaches here are full of fossils and fertile rock pools. Finally, a must see for it’s cinematic cliffs and dramatic scenery is the stunning views from Nash Point.

The majestic lighthouse is somewhat of a hidden gem of the coastline, as it harbours some amazing views of the rugged rocks. Families and dogs are welcome to come and roam the coastal cliff paths here all year round. There are two main car parks and a little cafe, which hosts some private toilets for customers.

Southern Wales has some truly spectacular sites and is well worth a visit, even if it is for a whirlwind weekend of adventure or for a longer holiday. For myself, I know I have fallen in love with this wonderful section of Wales and will be heading back again in July to explore more soon. For further information please go and visit @SouthernWales for further travel ideas or visit their Welsh site at @DargandeCymru on Instagram.

Digtal Nomad

A digital nomad is someone who works remotely. There are lots of different ways to earn money when traveling as well as working remotely can also have lots of benefits. It can reduce your stress with no daily commute, no additional hidden costs and give you more time to pursue the things you enjoy. If you considering making the leap to being a part-time and full digital nomad, here are some things to think about before making the transition.

When should I work?

Working seasonally (Part time work and part travel depending on the season) can be a great way to earn money and live in new and exciting places. Or if you want to travel full time and keep earning by working on the road. There are lots of ways to do it by creating your own business by utilising and selling your skills, becoming freelance in your current profession or moving to working online. With Covid 19 lots more jobs are able to be done from a remote platform.

What job can I do?

Photographer? Designer? Engineer? or maybe a teacher like me. Working from a computer means there are a lot of careers open to you. Using social media is also a powerful tool. I use my platform online to do photography work and use my social media to showcase my photography skills. Teaching online can be a great way to earn a steady income with few formal qualifications in teaching. A short course of a TEFL or CELTA would be sufficient to work most online tutoring platforms and private digital schools. My best friend also runs social groups, buys and sells items like a digital auctioneer, so there are quite literally hundreds of ways to work online to create revue. It just depends on finding something that is suited to your skills.

What challengers are there?

Being prepared isn’t always the easiest when out in the wilderness. So by creating a mobile office, purchasing solid gear like a Net gear booster for internet network coverage in more remote places is essential to allow you to have a work and play timetable for maximum efficiency. I would also advise joining a digital community to allow you a sense of professional community and stay updated with key changes.

I create income to travel by working as a teacher for a Teaching Agency. I undertake placements teaching primary school, which allows me to teach where and when I want to. I also make some additional income by being a social media influencer and photographer. I have a wedding and events photography business. I also use my photography skills to create marketing media content for companies and PR for brands and businesses.

How to plan for a road trip?

Planning can be key when spending weeks and months away travelling in a van abroad. This is my process of how I plan for a big road trip.

1) Budget. I work from a budget first. I ask myself how far can I go for how much money? I give myself a daily allowance for miles and food. I work at €10 a day for food and the biggest part of the budget goes on fuel at coverage being anywhere from 3000-7000km per road trip.

2) Time. I book time off work and cover my expenses at home first. I would expect an international road trip to multiple countries to take 6-8 weeks. If I am visiting just one place around 3 weeks like France in August this year.

3) Route. I research using Google, guidebooks, adventure podcasts, insta to look at places I want to see and join up the attractions and landmarks to make a route.

4) Research. I check out the rough route for tolls, crossings by ferry or tunnel and check seasonal closures espically in the autumn. Mountain villages have different opening hours, taking a break before reopening for the winter seasons. This can make buying food and fuel interesting. And I find I’m better stocking up in the larger towns before heading into the remote hills.

5) Insurance and logistics. I use @avivauk
For my breakdown cover and insurance. I also tend to take @poferries for crossings or the @eurotunnel to leave the UK midweek for cheaper crossings off peak.

6) Packing. Taking clothing and the correct gear for the weather is essential. For an autumn trip, espically through the mountains it can be warm and cold in the same day with sunshine and snow so I pack for multiple seasons.

7) Service. I ensure the van is fully serviced and stocked up. I take tools with me incase or any issues on the road that I have the skills to fix. I also carry a full spare tyre too. ( If you would like to see what van essentials I pack head to my blog for a comprehensive list of everything I take with me)

8) Navigation. When I hit the road I also make sure I have maps download on my phone. I use @hiiker_ for walking and I use Park for the night for wild camping spots and plan it when I’m nearby.

Discover West Wales

Why Wales?

If you like stunning scenery, great food, untouched landscapes, historical heritage, and the tongue twisting fun of the Welsh phonetical language. Then Wales has it all you can be at a coastline in an hour or the mountains, lakeside or forest. It’s diversity of urban and protected parks are beautiful. With only a week before the end of the summer holidays I took full advantage of the bank holiday by going on a micro adventure around Wales with no time to loose. With just 7 days to pack in as much adventure, as I could and savour the last taste of summer I packed out the van in the 30 degree heat of the bank holiday and headed down the M6 to Wales.

My route around Wales

walks

I started with my trip with a hike in the Brecon Beacons with a hike to the Llyn y Fan Fawr  at the foot of Fan Brycheiniog, the highest peak of the Black Mountain range. You are formally asked not to sleep next to the start of the trail as it is inside the national park. But there are plenty of stops outside the park where you can park up overnight to start the trail early in the morning. Under the recommendation of Welsh educator and general outdoor legend Hue James. I took the turning to the left onto the single track road north to the left of the A4067 after Glyntawe. Following the River Tawe I parked on the side of the road and hiked up the hill and crossed the river multiple times to take and took a grassy path up to the tarn. The trail is quite and I didn’t pass anybody all afternoon. It follows the river to the tarn and past numerous waterfalls. This time of year the beautiful Rowen trees where all shining with red berries framing the water filled crevice’s in the landscapes with bright ref flashes of colour. You can hike up and around the tarn in less than an hour and to then climb the mountain and ridgeline behind it I would give another hour as there are moderate to difficult sections of steep steps and scrambling slabbed sections. As it is also the highest peak it’s very windy up at the top, however on the day I went it was a warm and sunny day and I was fine treading the path at the top. But in the winter and snow I imagine it is a very different story up there.

On my way back down to the van I also snuck in a swim to cool my achy feet in one of the many waterfalls as it was so quite and beautiful!

My next walk was over in the Mumbles and the Worm over at Rhossili with their dramatic cliffs and super accessible car parks it was a great afternoon out. Rhossili beach is especially beautiful but if you time park at the national trust car park and buy a doughnut and head over on the cliff top walk to see the dramatic cliffs and the best of the peninsular islands ragged and jagged sticking out of the sea to the backdrop of sandy beaches. It’s a stunning place. Just be careful when your sitting down eating your lunch your are set upon by the Shaun the sheep’s terrorists companions…TICKS. Sheep roam the National Trusts land there. Lots of ticks in the headland there so check your legs before you leave!

Windswept and interesting with Rhossili beach in the background
views from the cliff looking out the islands
Thanks @hygee for the awesome polarised sunglasses

My last walk was to stomp out onto the PCP or Pembrokeshire Coastal Path. I have walked sections of the path before and know about it’s tenacious ascents up and down and how sections can be steep but offering some of the best coastal scenery with wildlife, flora and fora that Wales has to offer. I walked the few km to the Witches Cauldron situated near Moylegrove in Cardigan. There cast against the cavernous coastline resides a lonely collapsed cave. The subsequent erosion and tidal pooling means this has now formed into a beautiful hole in the highcliff face. The natural pooling of water that makes this a popular attraction for the area as twice a day the sea rises and falls making travelling through the low hanging walls of the cave entrance scary, but beautiful as the light fills the water and creates the most amazing green coloured sea. You feel like your swimming through a potion!

Me and Andrew love to swim. This is at our local at Chasewater reservoir

This was hands down my favourite experience of the trip. I swam down from the cove and out to sea and came back on myself entering the cave by swimming through a small entrance in the cave, which was filled with speckled sunlight from the sunny day. I then reached the opening and was greeted by a small pool with a pebble scree beach and a waterfall at the west exit of the pool where there is a small hole where water can travel through to the other side.

<video controls src="<blockquote class="instagram-media" data-instgrm-permalink="https://www.instagram.com/p/CRCGZ_NDnHS/?utm_source=ig_embed&utm_campaign=loading&quot; data-instgrm-version="13" style=" background:#FFF; border:0; border-radius:3px; box-shadow:0 0 1px 0 rgba(0,0,0,0.5),0 1px 10px 0 rgba(0,0,0,0.15); margin: 1px; max-width:540px; min-width:326px; padding:0; width:99.375%; width:-webkit-calc(100% – 2px); width:calc(100% – 2px);"><div style="padding:16px;"> <a href="https://www.instagram.com/p/CRCGZ_NDnHS/?utm_source=ig_embed&utm_campaign=loading&quot; style=" background:#FFFFFF; line-height:0; padding:0 0; text-align:center; text-decoration:none; width:100%;" target="_blank"> <div style=" display: flex; flex-direction: row; align-items: center;"> <div style="background-color: #F4F4F4; border-radius: 50%; flex-grow: 0; height: 40px; margin-right: 14px; width: 40px;"></div> <div style="display: flex; flex-direction: column; flex-grow: 1; justify-content: center;"> <div style=" background-color: #F4F4F4; border-radius: 4px; flex-grow: 0; height: 14px; margin-bottom: 6px; width: 100px;"></div> <div style=" background-color: #F4F4F4; border-radius: 4px; flex-grow: 0; height: 14px; width: 60px;"></div></div></div><div style="padding: 19% 0;"></div> <div style="display:block; height:50px; margin:0 auto 12px; width:50px;"><svg width="50px" height="50px" viewBox="0 0 60 60" version="1.1" xmlns="https://www.w3.org/2000/svg&quot; xmlns:xlink="https://www.w3.org/1999/xlink"><g stroke="none" stroke-width="1" fill="none" fill-rule="evenodd"><g transform="translate(-511.000000, -20.000000)" fill="#000000"><g><path d="M556.869,30.41 C554.814,30.41 553.148,32.076 553.148,34.131 C553.148,36.186 554.814,37.852 556.869,37.852 C558.924,37.852 560.59,36.186 560.59,34.131 C560.59,32.076 558.924,30.41 556.869,30.41 M541,60.657 C535.114,60.657 530.342,55.887 530.342,50 C530.342,44.114 535.114,39.342 541,39.342 C546.887,39.342 551.658,44.114 551.658,50 C551.658,55.887 546.887,60.657 541,60.657 M541,33.886 C532.1,33.886 524.886,41.1 524.886,50 C524.886,58.899 532.1,66.113 541,66.113 C549.9,66.113 557.115,58.899 557.115,50 C557.115,41.1 549.9,33.886 541,33.886 M565.378,62.101 C565.244,65.022 564.756,66.606 564.346,67.663 C563.803,69.06 563.154,70.057 562.106,71.106 C561.058,72.155 560.06,72.803 558.662,73.347 C557.607,73.757 556.021,74.244 553.102,74.378 C549.944,74.521 548.997,74.552 541,74.552 C533.003,74.552 532.056,74.521 528.898,74.378 C525.979,74.244 524.393,73.757 523.338,73.347 C521.94,72.803 520.942,72.155 519.894,71.106 C518.846,70.057 518.197,69.06 517.654,67.663 C517.244,66.606 516.755,65.022 516.623,62.101 C516.479,58.943 516.448,57.996 516.448,50 C516.448,42.003 516.479,41.056 516.623,37.899 C516.755,34.978 517.244,33.391 517.654,32.338 C518.197,30.938 518.846,29.942 519.894,28.894 C520.942,27.846 521.94,27.196 523.338,26.654 C524.393,26.244 525.979,25.756 528.898,25.623 C532.057,25.479 533.004,25.448 541,25.448 C548.997,25.448 549.943,25.479 553.102,25.623 C556.021,25.756 557.607,26.244 558.662,26.654 C560.06,27.196 561.058,27.846 562.106,28.894 C563.154,29.942 563.803,30.938 564.346,32.338 C564.756,33.391 565.244,34.978 565.378,37.899 C565.522,41.056 565.552,42.003 565.552,50 C565.552,57.996 565.522,58.943 565.378,62.101 M570.82,37.631 C570.674,34.438 570.167,32.258 569.425,30.349 C568.659,28.377 567.633,26.702 565.965,25.035 C564.297,23.368 562.623,22.342 560.652,21.575 C558.743,20.834 556.562,20.326 553.369,20.18 C550.169,20.033 549.148,20 541,20 C532.853,20 531.831,20.033 528.631,20.18 C525.438,20.326 523.257,20.834 521.349,21.575 C519.376,22.342 517.703,23.368 516.035,25.035 C514.368,26.702 513.342,28.377 512.574,30.349 C511.834,32.258 511.326,34.438 511.181,37.631 C511.035,40.831 511,41.851 511,50 C511,58.147 511.035,59.17 511.181,62.369 C511.326,65.562 511.834,67.743 512.574,69.651 C513.342,71.625 514.368,73.296 516.035,74.965 C517.703,76.634 519.376,77.658 521.349,78.425 C523.257,79.167 525.438,79.673 528.631,79.82 C531.831,79.965 532.853,80.001 541,80.001 C549.148,80.001 550.169,79.965 553.369,79.82 C556.562,79.673 558.743,79.167 560.652,78.425 C562.623,77.658 564.297,76.634 565.965,74.965 C567.633,73.296 568.659,71.625 569.425,69.651 C570.167,67.743 570.674,65.562 570.82,62.369 C570.966,59.17 571,58.147 571,50 C571,41.851 570.966,40.831 570.82,37.631"></path></g></g></g></svg></div><div style="padding-top: 8px;"> <div style=" color:#3897f0; font-family:Arial,sans-serif; font-size:14px; font-style:normal; font-weight:550; line-height:18px;"> View this post on Instagram</div></div><div style="padding: 12.5% 0;"></div> <div style="display: flex; flex-direction: row; margin-bottom: 14px; align-items: center;"><div> <div style="background-color: #F4F4F4; border-radius: 50%; height: 12.5px; width: 12.5px; transform: translateX(0px) translateY(7px);"></div> <div style="background-color: #F4F4F4; height: 12.5px; transform: rotate(-45deg) translateX(3px) translateY(1px); width: 12.5px; flex-grow: 0; margin-right: 14px; margin-left: 2px;"></div> <div style="background-color: #F4F4F4; border-radius: 50%; height: 12.5px; width: 12.5px; transform: translateX(9px) translateY(-18px);"></div></div><div style="margin-left: 8px;"> <div style=" background-color: #F4F4F4; border-radius: 50%; flex-grow: 0; height: 20px; width: 20px;"></div> <div style=" width: 0; height: 0; border-top: 2px solid transparent; border-left: 6px solid #f4f4f4; border-bottom: 2px solid transparent; transform: translateX(16px) translateY(-4px) rotate(30deg)"></div></div><div style="margin-left: auto;"> <div style=" width: 0px; border-top: 8px solid #F4F4F4; border-right: 8px solid transparent; transform: translateY(16px);"></div> <div style=" background-color: #F4F4F4; flex-grow: 0; height: 12px; width: 16px; transform: translateY(-4px);"></div> <div style=" width: 0; height: 0; border-top: 8px solid #F4F4F4; border-left: 8px solid transparent; transform: translateY(-4px) translateX(8px);"></div></div></div> <div style="display: flex; flex-direction: column; flex-grow: 1; justify-content: center; margin-bottom: 24px;"> <div style=" background-color: #F4F4F4; border-radius: 4px; flex-grow: 0; height: 14px; margin-bottom: 6px; width: 224px;"></div> <div style=" background-color: #F4F4F4; border-radius: 4px; flex-grow: 0; height: 14px; width: 144px;"></div></div></a><p style=" color:#c9c8cd; font-family:Arial,sans-serif; font-size:14px; line-height:17px; margin-bottom:0; margin-top:8px; overflow:hidden; padding:8px 0 7px; text-align:center; text-overflow:ellipsis; white-space:nowrap;"><a href="https://www.instagram.com/p/CRCGZ_NDnHS/?utm_source=ig_embed&utm_campaign=loading&quot; style=" color:#c9c8cd; font-family:Arial,sans-serif; font-size:14px; font-style:normal; font-weight:normal; line-height:17px; text-decoration:none;" target="_blank">A post shared by Tanya (@happywelshfeet)</a></p></div></blockquote> <script async src="//www.instagram.com/embed.js">
Head out at the bottom of the cover and out into the bay like we are here then turn right and double back on yourself to come through the cave in high tide.
The other side of the cave

SUP

I went for a walk, fish and chips to meet a van friend in Saundersfoot. Despite the busy pubs and bustling towns streets. The beach is beautiful and there are quite places to walk. Me and Homer blew up my paddleboard and headed out for a Sunset SUP in the bay and watched a perfect sunset sky change its colours as the stars began to come out.

Sunset on over the bay from the water

I had a great time exploring the bay making a new friend and a lovely paddle! I would definitely come back again, parking is super easy when parking east of the bay near the pub right on the sea front.

Parking on the seafront
Swim and SUP with new friends

On route up north I would also suggested in Pothmadog and Harlech beach and pretty town and if your passing Port Merion is a stunning afternoon out. A scenic place with you feel like your on a film set due to its neo classical architecture and colour Sicilian Italian contours. Set against the sea and welsh mountains. I really enjoyed the animal reserve and dunes are Harlech beach which if you walk from the top of the hill in the town about a half an hour down the sea steep walk past the iconic castle. Harlech is a stunning place and the beach on a summers day is a shallow light blue set against white sands.

Me and Sarah enjoying the best of the Welsh Summer weather! It was HOT HOT HOT! Thank you to Selkie for my beautiful swim suit, hoody and cap kitting me out with some the best British swim wear!
Walking the beach at Port Meirion
Hat selfie fail. When your sun hat is so big it blocks out your mate in the photo!

What an end to a wonderful solo trip in my last week of the holidays, meeting old friends and making new ones and seeing some beautiful places. West Wales is truly stunning and a must see place to tour in a van.

UK Road Trip – From the Isle of Skye to the Lake District

I decided to live in the Van in June and began touring the UK and end in Europe in an epic van road trip of the North of the UK. I started in the Lake District and headed to Scotland for the the Isle of Skye. To do a leg of the island in 10 days. After a short loop of the Scottish highlands I then headed of Yorkshire’s finest coastlines and ended my UK leg in the Lake District.

I finished work early this year and moved things out of my rented address. I packed up the van and headed to see friends, explore new places and hike, swim and sup in some beautiful natural landscapes! I would do it again in a heartbeat. Here are some of my highlights and best bits.

This is where I started in Lake District!

I pulled off the M6 to head to Ullswater first on my northern leg to start my trip at the lake and take swim. I always love this view from the boat house.
A quick dip in Ullswater as it was 32 degrees and absolutely beautiful, that day. The reason I started the trip was Scotland at this time in the early summer was due to the fact the UK was in a mini heat wave.
I drove from Ullswater to my Brothers house to watch the England Game in Lockerbie and not so elegantly reversed into a lampost on his drive, DOH. I took off the left side panel on the van. I manged to fix it and did a bodge. But the bumper did it’s job and protected the frame.
After leaving Lockerbie I decided to plan a general route of things I wanted to see including a few tourist stops. This was my route around Scotland.
From Lockerbie I went straight up to Glenfinnan Railway. This is a cute like tourist spot with accessible walks for everyone. This shot of the viaduct is taken from the hill just under the tunnel and follow the signs for the view points. The train comes twice a day in the summer and you can find the times online and at the little tea shop. Parking is a few pounds and i remember there being separate parking for vans with a height barrier for vans.
A great sleepover by Loch Lochy and a morning SUP on the loch. I saw two jets fly over here whilst on my board and pulled into this little beach after incase they flew back to try and get a better look!
SUP views out over Loch Lochy
Camping in a layby on Loch Lochy, this was a great spot to get my SUP out in the morning and go for a paddle.
There was a few other campervans sharing this parking space with me. Everyone was very nice and private and I said hello to anyone that passed by infront, as I kept the door open and popped in and out onto the private beach below.
After leaving that Loch I drove through the Highlands and took in the beautiful scenery. I pulled after Loch Garry to take a picture of the Glen. This old boy was playing bagpipes for tourists in the pull in. When I asked to take his picture he grabbed my arm and said not until he played me a song first. Thank you to the two girls in the Golf who took this picture of us making friends on my camera.
After coming through the beautiful Glen Sheil where the battleground is marked if you want to take a walk down the valley. I came to Eileen Dolan castle.
Once on the island I blasted past the busy Portree and up the right hand side of the Island across the mountains to Rigg viewpoint, which is absolutely beautiful and has great views out the Islands of Rona and Rassy. You can see Applecross and the mainland of Scotland in the background too a fantastic place to watch the sunset. I also camped here overnight.
Sunset views. Me and the sheep enjoying a full blown skyline bonfire which didn’t set until 11 pm, as the sun sets later the further you head north! Note to self pack darker curtains as it also gets light at 4 am!
I headed from Rigg back down the coast to start The Man of Storr trail. This has a windy path to start, then cuts into some slab step which are well walked. The trail then forks to a short trail around the base of the stones and cliffs. You can take a loop trail up and around, just avoid falling rocks from the cliff stacks. Or I took the path up past Storr and into the hills behind to get a better view from the side of rock formations.
A spooky place in the morning mist, I can see why places like this hold so much spiritual intrigue. I didn’t see any fairy’s just two hikers who slept at the top of one of the hills next to stacks. I came down at 9 am before the crowds came and cracked on with my site seeing.
This is my face after a week of vanlife and at 5am after a few hours sleep. I would still do it all over again. As it’s a beautiful places that can be very busy in the summer and I had it pretty much all to myself!
Quick selfie over looking the Loch Leathan before the crowds arrive for a day of walking
Morning views from the van. For more roadtrip destinations you can visit this was a helpful map for me and i kept a PDF download of it on my phone as the island has one main coastal road most of the way around. Image result for map of isle of skye
After scaling the north coast I visited the Fairy Glens and headed down to Glenbrittle to explore the Cullins Mountain range and their amazing waterfalls.
The Sgurr Dearg Path leaving from Glenbrittle itself is beautiful. There are lots of paths like this one starting opposite the white house YMCA, which has a parking bay. Leave your vehicle there and head up the walking path into the hills to experience beautiful waterfalls and gorgeous mountain views like this.
If you need a campsite down in Glenbrittle the the Glenbrittle Campsite is located right on the beach. They serve hot tea and coffees, which is lovely after a long cold walk or climb in the hills if you camping and there hot showers were great and run late into the evening.
Admiring the Cullins on another hike searching for more waterfalls. This region of Skye was my favourite.

On route off Skye I stopped on my way through the Highlands down south to take a few hikes and adventure on route. This was a super quite place to sleep I didn’t see a car or a soul for 16 hours.
A hike through Glen Sheil and to take the route at the base of valley just like the soldiers did when fighting hundreds of years ago! This was the most wonderful road and I really enjoyed my day here.
On route down off Skye the weather turned so I filled up at Fort Bill and headed to Glen Coe and took a trail through the valley past the Three Sisters.
Quick shower stop on route to Yorkshire after all the river dipping I like to make sure I am clean before I enter new water sources as I don’t want to contaminate it with my sun cream and mosquito spray.
First stop in Yorkshire was at the Gap, I wanted to visit Haiden’s Wall and walk to the tree at Sycamore Gap
The path is well walked and laid out and holds some beautiful scenes of the Yorkshire countryside.
Sycamore Gap on a sleepy Thursday afternoon in early July. Made super famous in the 90s with the film Robin Hood.
Stunning views and in the heatwave 34 degrees and one of the hottest day of the year. I had to take breaks and drink lots of water. There is parking at the YMCA near here, which is were I parked and they sell ice creams and hot drinks too!
I headed for York first to see my friend and old band mate Paul. After a delisous dinner in town I headed off for the North York Moors and to Filey Brigg.
After picking up my buddy we went to Flambrough to see the wild cliffs and explore the cliffs at Flamborough
The beach at Filey was absolutely stunning and not a soul there after 6pm. After a sea swim we made a bonfire and had our dinner right on the beach and watched the sun come down.
The sunset was exceptional from the beach front
Kyle or Impala as he is know on social media as he is my thru hiking buddy. He is also a total legend and has walked through America, New Zealand, Europe and at this point in summer he had finished the LEJOG end to end 1020 miles hike the week before this. He is currently walking the HTP, or the length of Pyrenees go check out his adventures.
After leaving the coast I headed to see another insta friend @mountains_whisky_wirehairs of mine who lives on a farm and just had some puppies, so naturally I had to stop and visit!
After leaving the North Yorkshire I headed into the Dales and to visit the waterfalls near Ingleton.
There is parking in the village at Ingleton or pay at the center where the majority of the walks start from. The car park closes at 6 but you can still access the trails all evening in the summer.
I pitstopped in Harrogate to pick up my brother and his wife and we headed to Knaresbrough to their newly built house
I have vowed to come back here and take my paddleboard!

I then headed back to the Lake District to meet my girls for a fantastic day by the lake at Ullswater.

So June and July were pretty busy and then I left the country and headed for France! Check out my Alpine van adventure!

Road Trip Essentials.

How to pack for a road trip.

A question I receive a lot on social media is what I take with me on a camping trip?

What’s inside the van here? Toilet, 10L water container, Shower, washing bowel, washing line, spare bedding, laptop, camera, 12v fridge, brush, stove, compressor, rucksack with clothes and toiletries, outdoor waterproof dry bag filled with waterproofs and outdoor e, gas kettle, mess tin, cup, boots, trail shoes. ALL my non negotiable essentials for 7 weeks on the road.

Whether you are using campsites or choose to wild camp when roadtrippin. There are some basic essentials I would definitely recommend investing in to make Vanlife a little bit less stressful and maximise your camping experience.

Strorage

I would also suggest thinking about layout when packing your van. By thinking about how easy things will be to grab and where you want to put things it can maximise space too, allowing you to take more of the important things.

Ask yourself, where will the heaviest weights be stored like where to keep your water? Weight should always be evenly spread for better suspension and stress on your axle. I keep my water for example with an easy to reach 2L bottle under the front seat. I keep my 10L carrier in the middle of the van under the bed over the back wheels. I keep big items like my SUP under the bed in my garage space and can hang my wet things underneath whilst I am driving.

My garage has a slide tray for my MTB. I store my SUP when I am not using my MTB. I have a SUP and MTB cleaning pump on the back door, leaving space for wet swimming stuff or clothes to be hung up and dried up.

I would also suggest putting in some storage baskets like these ones that just stick onto carpet and can be easily moved. Sometimes storage doesn’t have to look too neat it just serves a purpose. It is totally down to your style but try to think practically as well as stylishly when choosing your layout.

The tools I keep in my tool bag on the road and take with me. Tyre sealant, gaffa tape, electric tape, gloves, hammer, oil, wd40, jump leads, screwdriver, hammer, compressor for tyres, engine oil, cable tyre, spare hooks and staple gun, seal tape for leaks, and a assortment of bits and bobs I have needed in the past.

Another thing to think about would be where can you store wet things like coats and jackets and where to put muddy boots? I store mine in a basket under the bench seat. I also keep tools in the front for ease of access in case I break down.

I use baskets to separate things in the kitchen unit and magnetic strips and hooks for all of my cutlery

I have separated this blog into three sections to better appeal to everyone, so feel free to have a look and use these lists as a bit of a tick list for your packing essentials. If you would like to buy any of these items, just click on the item as I have attached a little Amazon affiliate link to the product to make it easier for you to find! I also get a little return if you decide to purchase anything through that link.

Weekend Trips

If you are headed away for a few days on a casual camping weekend, please see the list below.

Short Trips (3- 10 days)

I began to wild camp as I used to struggle booking in busy campsites during the holidays and term time breaks. Which is how I started to gravitate towards free camping especially in the UK.

I didn’t buy everything all at once. I have invested over the last 5 years building up my gear, whilst undertaking long term trips in a van and learning what I didn’t need and what I did. We are all beautiful and individual people, therefore what is essential to me you may not need. But there are basic things we all are better off having on a adventure. The only difference between a shorter trip and a longer trip would probably items needed to be more comfotble over a week or two, like the ability to wash your clothes or yourself more easily. I would suggest investing in…

A travel washing line

tub for washing clothes

eco washing powder

12v shower

shower tray or shower tent

A larger power unit 500 w

Long trips 2-6 weeks

The longest van trip without using a single campsite was back in 2018 in New Zealand where I manged 9 weeks without a hot shower. It was the summer though and a cold shower was welcomed in the tropical heat. I lived in a basic Nissan Van conversion, that had been gutted out to fit quad bikes and belonged to a farmers son. BASIC but beautiful. But my blue LDV I have now is practically luxurious as a camper. I have a split charge system, an invertor, led lights, back up power through Jackery solar panels and a generator. I can live off grid for weeks at a time if I store my food and water carefully.

POWER is one of the most needed things on longer trips off grid.

Having the ability to recharge your batteries and devices is important, if you’re camping for longer periods of time without a constant power source.

I would recommend investing in a Jackery Solar Saga and 500w generator. I have had one of these for about 5 months and off a single full charge it will power a 12v fridge for a week on a single charge. The more devices drawing power at the same time the more you will need to use the solar panel to recharge the generator. You can also plug devices straight into your solar panel for quick juicing and charges my phone in about 30 mins from a flat battery on a sunny day. It also performs well in the UK where let’s face it we don’t get sunny days everyday of the year. But even on a shady day it will still charge well.

It may also be worth investing in time finding refills for your water (always take listed drinking spring water, if you still aren’t sure, use water purification tablets) so you don’t have to keep buying bottles of water, and instead refilling it and storing it larger canisters.

Living in a van Full time!

DCIM\100GOPRO\GOPR1349.JPG

For a more long term sustainable lifestyle. I found before committing to full time vanlife was the bathroom set up, heating, Internet access, and ongoing food, fuel and water costs. It may also be worth you renting a unit space or a post box address to store your possessions and also keep a residential address for your mail.

I had a stint of living in the van full time. From my experience these are the things I thought about most before I moved in.

Bathroom

Waste or black water can be disposed of in most places that offer facilities for campers or vans. Please don’t pour it directly into drains as chemicals from toilets can be unrefined in some water systems and have strong toxic chemicals, which can effect any wild sources they come into contact with if they don’t flow to a treatment center. You can use apps like Park for the Night and it will tell you where the nearest facility is to you using your GPS location. I would also opt for a more eco friendly loo than the average camping loo which is chemical or an eco loo, which you can pack cheaply with sawdust and packing material.

Heating

Heating and bulking up current insulation with extra lambs wool or the cheaper Earthwool behind the panels and ventilating the van with a ceiling fan.

I also decided to bite the bullet and invest in a diesel heater for those cold nights rather than have the weight and space of a wood burner. I also chose to take the bulk head out for space and put some curtains up for privacy.

Internet

I also use a Netgear to allow a Wifi connection through the box. I also now have an unlimited 4g contract with three and good network coverage in most places for £28.00 a month as I own my phone outright.

Food, Water and Bills

Learning about refill centers! Yes this is a thing there are shops which are more eco friendly and will see you stock up on refills, so you don’t need to spend extra money on plastic packaging. It is more sustainable and better for refilling water and much lighter on your purse to! Use this link by clicking here to find centers around the UK for food, water and essentials like washing powder. I also invested in breakdown and recovery changes to my policy as I no longer homestart. It is little things like this you never think about at the time but can save you a few quid.

An adventure weekend in the Lake District

Top Destinations. Coniston Water, South Lakes, Grizedale Forest, Rydal Falls, Lake Windermere.

This Summer me and Andy met up with some of my fellow van friends and DIY roadies Lisa and Colin, you can find them at @SHED_WITHABED. Or through my Instagram account posts at @VANLIFEWITHLUCI.

I originally had met Lisa through our love for the outdoors and adventure activities. We meet to go Paddleboarding on an icy winter morning in February in the Peak District and have friends ever since.

We deicide to go wild camping in the Lake District to mark the start of their van build and had a wonderful time exploring the Southern and Central Lake District.

Meeting at the East shore of Coniston Water. We parked the vans in the National Trust’s forest car park 5 minutes North of the Activity Center. There are clear no camping signs here to not stay overnight as we arrived some folks, who had were being camping overnight by the looks of it were being told to leave swiftly. However, we used this day parking space as a basepoint for our adventures as it is a 20 meter walk across the road to the pebble shoreline to cast off a paddleboard and head into the water.

DCIM\100GOPRO\GOPR1146.JPG

After blowing up our paddleboards and having a catch-up with a coffee we set off for a swim and a paddle. Coniston is a beautiful body of water 5.5 miles long which is perfectly framed by an outline of surrounding fells, including the famous Old Man of Coniston. Coniston Water itself was used to transport slate and ore from the many mines worked in the Coppermines Valley and I noticed that after swimming in the water my skin felt soft as the water is naturally filtered as it flows into the lake.

DCIM\100GOPRO\GOPR1133.JPG

The lake has little wind and was perfect conditions for a paddle despite being a drizzly day. My top top would be watch out for when the boats and passenger ferry whizzing by causing waves on the lake.

DCIM\100GOPRO\GOPR1162.JPG

We then left for a drive through to Rydal and to visit the waterfalls, which are a few km walks through the Rydal Hall Estate.

The house itself is a beautiful traditional 16th-century house and the grounds designed by Thomas Mawson in 1909 host lots of sculptures and forna from around the world.

The South of the ground also hosts a sculpture trail that is assessable for children and leads to a grotto. I would also suggest popping into the Viewing House, the first-ever viewing platform built in Britain which overlooks the lower falls through a cute little window perfect in any weather.

After a waterfall dip and tour around the stunning grounds, we left Rydall and headed to park up for the night and enjoyed a game of cards and listening to the birds and wildlife.

DCIM\100GOPRO\GOPR1155.JPG

Early Sunday morning I woke up to head into Ambleside village center to check out the high street and famous National Trust Bridge House. We then ventured up to Grizedale Forest to take the Grizedale Tarn Trail. A lovely steep walk in sections passing over the Centenary Bridge, and the forest’s current Clockwork Art exhibition.

There was a diverse array of newly planted coppice, forest and the tarn itself had a beautiful tarn where the bubbles are not from fishes, but the realise of natural methane. But that doesn’t stop the lily pads, dragonflies, and a host of insects and wildlife local to the area from thriving. You might occasionally hear the whizzing of a large zip line GoApe runs throughout the forest.

After lunch out of the van, we headed to the Southside of Lake Windermere at Lakeside. The site is all owned by National Trust and well managed. There is an old Victorian boathouse and the pleasure steam train stops there on its tour around the lake. A popular spot for swimming due to its warmer, shallower water as the lake flows out into the River Leven. It didn’t disappoint and the buoys were well marked and well used. A little busy on a Sunday afternoon our party still enjoyed a swim and soaked in the green and charming views that Windermere has to offer with pretty boats and yachts hosting their sails in the harbor.

Windermere is a great place for a swim and a giant ice cream, which can be brought out of the Boathouse cafe at the National Trust. Parking can be found at Fell Foot Park but at £10 a day as a flat rate for non-National Trust members it is worth staying for a few hours.

After a wonderful weekend spending time with friends and exploring lakes, forests and waterfalls we said goodbye to each other and headed out of the Lakes with a heavy heart and hopeful promise to visit again soon and see the North and Eastern lakes next time.

Top 3 Tips for Van Adventures in the lakes

CHECK ROUTES if you are using a sat nav ensure you have it set to the correct width of your van, as some roads are very narrow and steep.

PARKING can be very expensive as it is a well-visited and accessible part of the UK from lots of cities. Therefore,

STAY OUT OF SIGHT. Overnight camping on the lakesides can be difficult as you are more likely to be moved on by police or locals as you are more visible. The roads around the Lakes are well-traveled and monitored, so keep a backup plan and check out overnight friendly carparks with toilets and cheap campsites in advance.

Easy Van Meals

Nutritious, quick vegetarian meals to try out when your away camping. I am a veggie but most meals you could susbitute for meat alternative or vegan based alternative for example rather than hulumlli smoked tofo would be a great alternative. I have been living and cooking outside when camping from a portable kitchen for about 5 years now, so I have become quite practiced in wanting to make simple but yummy quick meals to save gas, lots of washing up and wasted time.

Cooking Italian bruschetta at Lake Como
The Old T4 set up with a kitchen out of the backdoors

I have recently invested in a larger cooker. I used to use a single hob portable camping gas cooker and have switched to a Party Grill 400cv from Blacks Online. I made the switch up as after years of making do I was limited to the types of cooking i could do outside without a grill, oven or skillet hotplate.

Tools

I only every carry basic cooking equipment with me due to weight and space a single wok, saucepan and lid for straining, and frying pan. For utensils for cooking I have two smalls knives, peeler, grater, plate, bowel, knife and fork, I also invested in a descent wooden copping board. I have a good stock of fresh herbs and spices as I have glued my jars to the underneath of my storage baskets in the kitchen to maximise space and ease of access.

My old portable single hob cooket from Go Gas  camping stove from Go Outdoors.
My old portable single hob cooket from Go Gas camping stove from Go Outdoors.

Recipes

MOROCCAN FALAFELS WITH HARISSA COUSCOUS for two (Lunch or dinner)

Ingredients

100g couscous1 Pack of Falafels 150ml hot vegetable stock ( stock cube) ½ tbsp lemon juice 1 tbsp extra virgin olive oil 1 tsp sumac ¼ tsp sea salt ¼ tsp ground black pepper 10g fresh coriander, finely chopped 10 g fresh parsley, finely chopped

For the yoghurt sauce:

5 tbsp Greek yoghurt, 1 tbsp lemon juice,Salt and pepper to taste

Method

  1. Place the couscous in a large bowl and cover with the hot vegetable stock. Place a plate or a sheet of foil on top of the bowl and leave for 5 minutes.
  2. Once the stock has been absorbed by the couscous, fluff the grains up with a fork and add the following ingredients: harissa, lemon juice, extra virgin olive oil, sumac, salt, pepper, coriander and parsley. Mix well until combined. Set aside.
  3. Remove the Cauldron Falafels from their packaging and cook according to packet instructions.
  4. To make the yoghurt sauce, combine all ingredients together, mix well and set aside.
  5. To serve, divide the couscous between four bowls, top with the Cauldron Moroccan falafels, drizzle over the yoghurt sauce and garnish with the spring onion and hemp seeds.

BBQ PULLED JACKFRUIT

Ingredients

  • 1 tbsp vegetable oil
  • 1 red onion, finely chopped
  • 1 tsp ground cinnamon
  • 1 tsp cumin
  • 1 tsp smoked paprika
  • 2 tsp chipotle Tabasco;
  • 1 tbsp apple cider vinegar
  • 2 tbsp BBQ sauce
  • 200g can chopped tomato
  • 100g or 1 can young jackfruit.

Method

1.Heat the oil in a frying pan and cook the onion until very soft, for around 10-12 mins.2. Add the cinnamon, cumin and paprika to the onions and cook for a further 2-3 mins.3. Next add the Tabasco, vinegar and bbq sauce and mix well before adding in the tomato, the drained jackfruit and 200ml water. 4. Leave to simmer gently, covered, for 30 mins stirring every 5-10 mins to help break down the jackfruit, then take the lid off and cook a further 10 minutes.5. Once cooked, use a fork to make sure all of the jackfruit is well shredded. 6. Check seasoning and add another tbsp of bbq sauce if necessary for extra stickiness.

GRILLED HALLOUMI AND SWEET PEPPER KEBABS

Ingredients

  • 250g halloumi cheese
  • 1 large bell pepper
  • 2 small red onions
  • 2 cloves garlic, peeled and crushed
  • 1 tbsp olive oil

Method

  1. Remove the halloumi cheese from the packet. Drain off water and pat it dry using kitchen paper. Slice into bite-sized cubes and put into a mixing bowl. Halve and de-seed the peppers and cut into bite-sized pieces. Peel the onions and cut each one into six wedges.
  2. Add the vegetables to the bowl. Stir in the olive oil, combining everything thoroughly and leave to marinate for at least 15 minutes..
  3. Thread the cheese and vegetables onto four skewers and grill under a medium hot heat, turning occasionally, for 8 minutes, or until the peppers begin to char.
  4. If cooking on a barbecue place on the barbecue on a medium/high heat and cook for 5-6 minutes; turning regularly, again until the peppers begin to char. Serve with the sauce.

SATAY STIR FRY NOODLES

Ingredients

For the sauce

  • 2 tsp fish sauce
  • 2 tsp dark soy sauce
  • 1 tsp chilli flakes
  • Juice 1 lime
  • optional 4 tbsp smooth peanut butter

For the noodles

  • 1 tbsp oil
  • 1 tin of water chestnuts
  • Handfull of greens and purple cabbage
  • Small handful sugar snaps
  • 1 small carrot, finely sliced
  • 2 spring onions, sliced on the diagonal
  • 2 x 150g packs soft egg-free ready-to-wok noodles
  • 2 tsp sesame seeds, small handful fresh coriander, nigella seeds, red chilli powder or flakes, red onion deseeded and finely sliced.

METHOD

  1. To make the sauce, stir soy sauce and chilli flakes along with 200ml cold water in a bowl. Whisk in the lime juice to form a smooth paste, adding an extra splash of water to loosen the mixture if needed.
  2. For the noodles, heat the oil in a wok over a high heat. When the oil is hot, throw in the vegetables and stir-fry for 1-2 minutes. Separate the soft noodles and add them to the wok. Pour in the peanut sauce and stir-fry for another minute. Serve sprinkled with sesame seeds, coriander, chilli and peanuts.

Advice For 1st Time Van Buyers

Are you tired of the same four walls? Have you been considering spending your time working remotely? How about trying out living in a rolling home! I have been asked through my Instagram questions about conversions, by people who are thinking of undertaking conversion projects and not sure where to start first. This blog is dedicated to addressing some of those questions.

What should I do first?

A classic chicken and the egg scenario of which comes first. I would recommend asking yourself, what will use the camper for? For example surfing, it could be useful to invest in roof bars to maximize storage inside your van. For MTB a garage space or bike rack with a fixed bed in the back could be better. If your living and working in it you may need to maximize space by having a dual sitting office space, which can be turned into a bed. If you going to spend lots of time living in the van, then a Bathroom shower unit and the toilet would be essential. I drew out a floor plan for my van of what I would like in it and got some inspiration for different layouts by looking at Pinterest and Instagram pages such as Vanlifeisawesome, Vanlifebuild, Vanlifediaries. After creating a rough draft of what you would like inside your van. I would make a loose budget I worked around £2,000 to buy a van and convert it, but I have a minivan and made all the units myself using refurbished and recycled materials, which kept costs down. Using BnQ, eBay, and Amazon to basket items can be a good way to cost up materials, tools, and soft furnishings like a mattress and labor if you are going to outsource installing your electrics.

What type of van should I buy?

The go-to for a lot of people is a dreamy old classic van like a VW. However, a modern van is discernibly larger. If you are working and living in your van as a couple or family, a larger van would be more suitable that allows you headroom and more storage so a high top or long-wheelbase will allow you more cubic space inside. For more info click here to find out on this van database what dimensions a van your interested in would be.

Is it safe to buy an old van?

Any used vehicle will have miles on the clock however, some low mileage inner-city trade vans like BT or decommissioned DPD vans are more likely to have breaking issues from stop starting, worn tires, from commercial use so even vans with a lower milage can still have issues. Low mileage can be great but if your budget means you are looking at 65-100k miles on the clock. Don’t be afraid to check the service history and previous ownership to see what the van was used for. Buying a used vehicle can always prove tricky but some obvious things to look for are bodywork, suspension (as you’re about to put even more weight into it) breaks, lights and electronic signals on the dashboard, engine rattling and knocking noises, paperwork check against the DVLA’s online database and ask for full-service history. A list of things to check against when going to test drive your potential new van can be found here.

What is next?After purchasing a van that will accommodate your need for space and cost, it’s now time to clean it and empty it out. By stripping your van down you can correctly insulate it, cut your ceiling fan in, put in your wiring so it is not on the show later. Go ahead and start buying your materials starting with your insulation and electrics needed and follow my step by step guide of how to build a campervan in 10 steps.